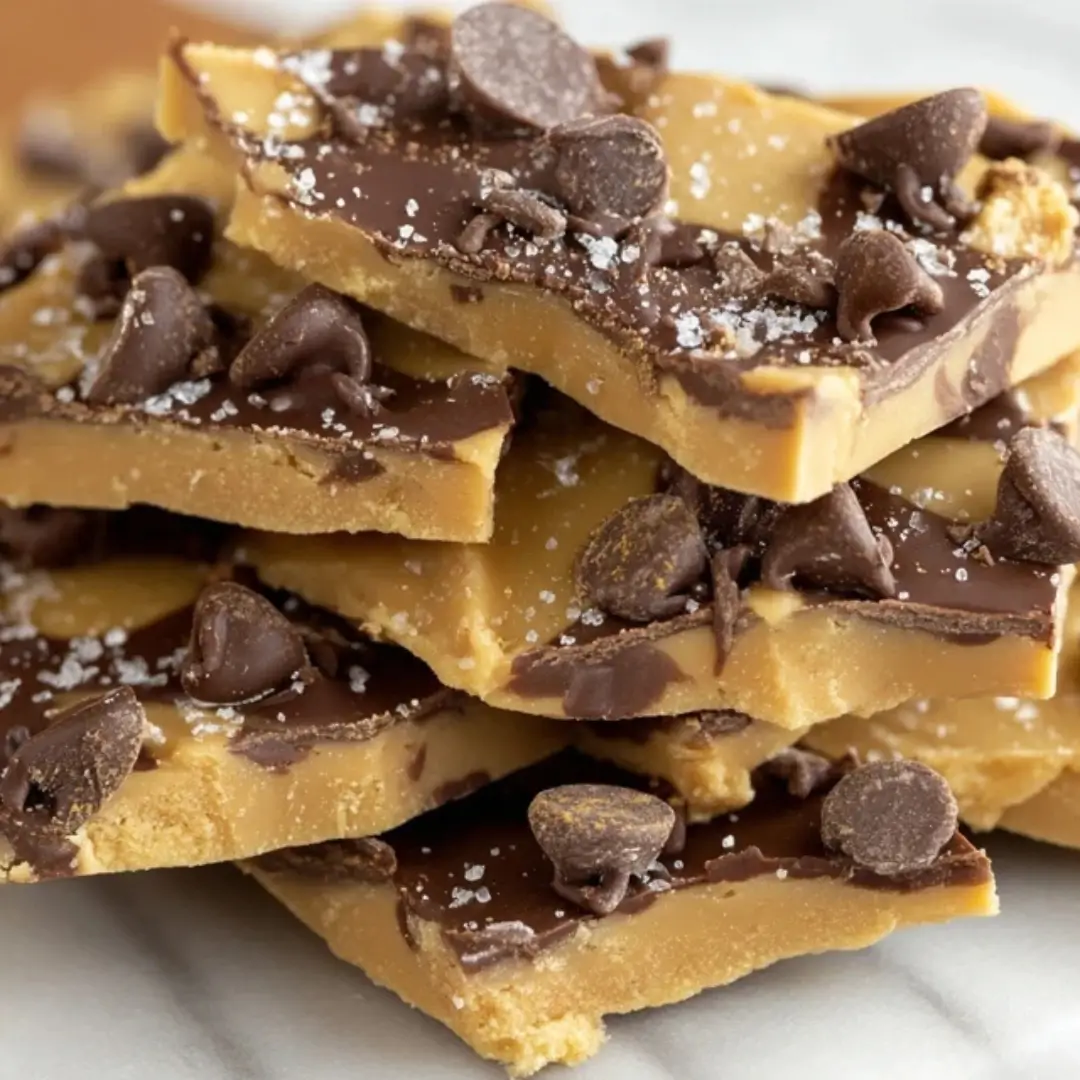
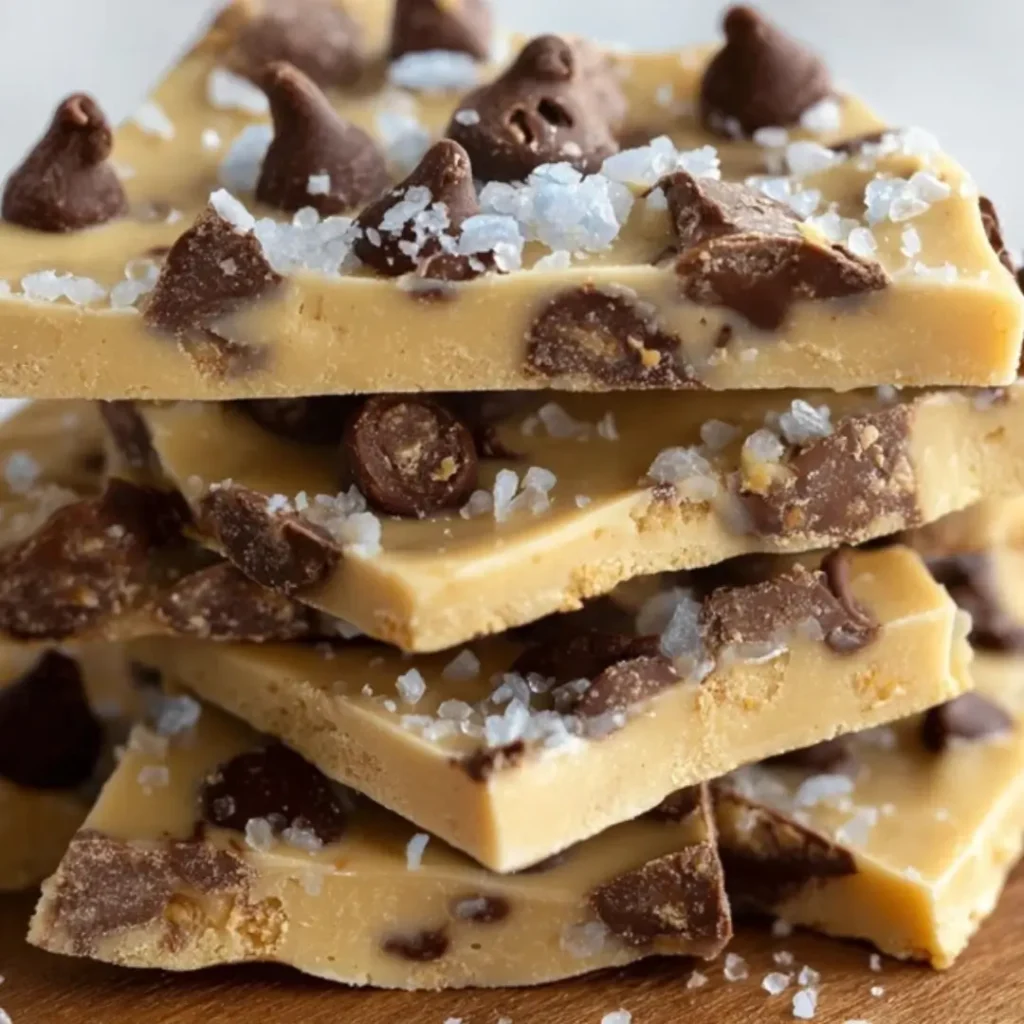
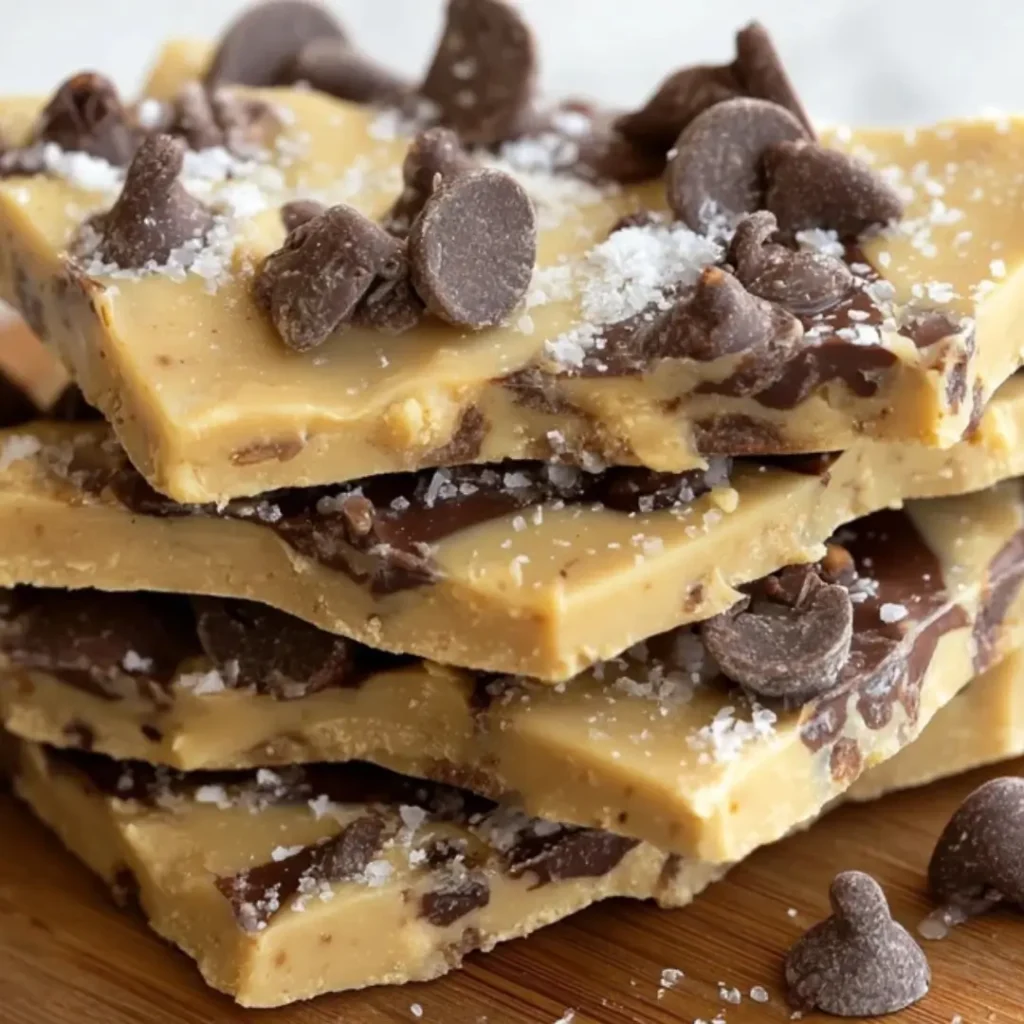
This recipe is a total game-changer, combining rich, fudgy chocolate bark with safe-to-eat, perfectly sweet cookie dough studded with mini chips. It’s the ultimate no-bake, sweet-and-satisfying dessert that takes almost no time to put together. Get ready to fall head-over-heels for this crunchy, creamy, childhood-dream-come-true! Trust me, your sweet tooth is about to thank you.
Why You’ll Love This Recipe
- No Oven Necessary! This is a true no-bake dream, perfect for summer heat, holiday rushing, or just when you can’t wait for cookies to cool.
- Safe to Eat: We’re heat-treating the flour so you can indulge in all that sweet, doughy goodness without a single worry. It’s pure, unadulterated pleasure!
- Completely Customizable: It’s super easy to swap in different mix-ins, from sprinkles to pretzels. You are the boss of your bark!
- A Texture Masterpiece: You get the satisfying snap of the chocolate bark combined with the soft, sweet chewiness of the dough. It’s an irresistible combination.
Ingredients
All you need for this sweet and glorious Cookie Dough Bark are a few pantry staples, and a little patience while it chills! Yes, it’s that easy. But first, gather up these essentials:
- Unsalted Butter: This forms the rich, creamy base for our dough. Make sure it’s softened so it creams easily with the sugars.
- Brown Sugar (Packed): Adds that classic, deep molasses flavor and a lovely chewiness to the dough.
- Granulated Sugar: For balanced sweetness and structure.
- Vanilla Extract: The secret MVP! A splash of vanilla deepens the flavor of everything.
- Milk: Just a tiny bit of liquid to help bring the dough together into the perfect, soft consistency.
- All-Purpose Flour (Heat-Treated): Crucial step! We toast this in the oven first to make it safe to consume raw—no baking soda or leavening needed here.
- Salt: Just a pinch to cut through the sweetness and highlight all the other beautiful flavors.
- Mini Chocolate Chips: These are the little pockets of joy folded right into the dough. They’re mini so you get more of them in every bite!
- Semi-Sweet Chocolate Chips: This is the foundation of our beautiful, snappy bark. Use a good quality chip for the best flavor.
- Coconut Oil or Butter: A small amount helps the chocolate melt smoothly and gives the bark a better “snap” once chilled.
- White Chocolate Chips (Optional): For a beautiful, professional-looking drizzle that adds contrast and an extra layer of sweetness.
(A note on measurements: Exact quantities and detailed steps will be found right under this article in the recipe card.)
How to Make the Cookie Dough Bark
Step 1: Prep the Flour for Safety
Before we do anything else, we have to make the flour safe! Spread the all-purpose flour evenly on a baking sheet. Bake it at 350∘F (175∘C) for about 5 minutes. This quick toasting kills any bacteria. Let it cool completely before moving on—don’t skip this part!
Step 2: Make the Cookie Dough Base
In a large bowl, use a hand mixer (or stand mixer) to cream together the softened butter, brown sugar, and granulated sugar until the mixture is light and fluffy. Next, stir in the vanilla extract and milk until everything is smooth and happy.
Step 3: Mix the Dough
Gradually mix in the cooled, heat-treated flour and salt until a soft, delicious cookie dough forms. Finally, use a spoon or spatula to fold in those adorable mini chocolate chips. Set your bowl of deliciousness aside.
Step 4: Melt the Chocolate Bark
In a microwave-safe bowl, combine the semi-sweet chocolate chips and the coconut oil (or butter). Melt them in short 20-second bursts, stirring really well after each one, until the chocolate is perfectly smooth and glossy. Low and slow is the key to preventing burning!
Step 5: Assemble the Bark
Pour the melted chocolate onto a parchment-lined baking sheet and spread it out evenly into a thin layer (about 1/4 inch thick). Now, grab small pieces of the cookie dough—no need to be neat here! Drop them artfully over the melted chocolate and gently press them in so they adhere.
Step 6: Decorate and Chill
If you want that beautiful finishing touch, melt the optional white chocolate chips and drizzle them over the top. Pop the entire baking sheet into the refrigerator and chill for about 45 to 60 minutes, or until the chocolate is completely firm and sets with a satisfying snap.
Step 7: Break and Enjoy
Once fully chilled, lift the bark off the parchment paper and break it into irregular pieces. It’s ready to be devoured!
Pro Tips for Making the Recipe
- Cool the Flour! I can’t stress this enough: adding warm flour to the butter mixture will melt the butter and ruin the dough’s texture. Make sure it’s cooled to room temperature!
- Go Low and Slow When Melting: When melting your chocolate, take it easy! High heat will make the chocolate grainy. Stirring every 20 seconds ensures it melts into a smooth, luxurious liquid.
- The Best Texture: This bark is best enjoyed straight from the fridge. The cold chocolate gives you that lovely snap, and the dough remains perfectly firm.
- Customize Your Dough: Feel free to swap the mini chips for sprinkles, M&Ms, or even chopped pecans!
How to Serve
This Cookie Dough Bark is a complete dessert on its own, but here are a few fun ideas for serving or pairing:
- The Perfect Treat: Serve it as a grab-and-go dessert straight from the fridge for parties, movie nights, or midnight snacks.
- Coffee Pairing: The richness of the chocolate and sweetness of the dough make it an absolute dream alongside a hot cup of coffee or a cold glass of milk.
- As a Topping: Break the bark into smaller, crumbly pieces and use it as an incredible topping for a scoop of vanilla ice cream or a bowl of frozen yogurt.
- DIY Dessert Board: Arrange a platter with the bark, fresh strawberries, salted pretzels, and maybe some caramel popcorn for an impressive dessert spread!
Make Ahead and Storage
Storing Leftovers
Due to the milk content in the cookie dough, it’s best to store this bark in an airtight container in the refrigerator. It will stay fresh and delicious for up to 1 week.
Freezing
You absolutely can freeze this bark! Once broken into pieces, place them in a single layer in a freezer-safe bag or container, separating layers with parchment paper to prevent sticking. It will last for up to 2-3 months. Thaw it overnight in the fridge before serving.
Reheating
This is a no-reheat dessert! It’s meant to be eaten cold, straight from the fridge or freezer, for that signature crisp chocolate snap and firm dough texture.
FAQs
Can I skip the step of heat-treating the flour?
Please do not skip this step! Raw flour can contain bacteria (like E. coli) that is only killed through heat. Since we aren’t baking this dough, we must heat-treat it by spreading it on a baking sheet and baking it at 350∘F for 5 minutes. Letting it cool completely ensures the dough is safe to eat and prevents the raw flour taste. It’s a quick, easy step that makes this bark 100% worry-free!
Can I use a different type of chocolate for the bark base?
Absolutely! While semi-sweet is the classic choice that balances the dough’s sweetness, you can easily use milk chocolate for a sweeter result, or dark chocolate (up to 70% cacao) for a more intense, less-sweet flavor. Just remember that dark chocolate may need slightly less coconut oil to melt smoothly. You could also try a combination of milk and dark to find your perfect balance!
Why is my melted chocolate looking thick and gritty?
This usually happens when the chocolate gets too hot or if a drop of water or milk gets into the melting chocolate. To prevent overheating, melt the chocolate in short 20-second bursts, stirring constantly to distribute the heat. If it does seize up, try stirring in a tiny splash of additional coconut oil or neutral oil to see if you can smooth it out again, though it may not be as glossy.
How can I make this Cookie Dough Bark gluten-free?
You can easily make this recipe gluten-free! Simply substitute the all-purpose flour with your favorite cup-for-cup gluten-free flour blend (like King Arthur or Bob’s Red Mill). You still need to heat-treat the gluten-free flour blend following the same instructions (350∘F for 5 minutes) to ensure it is safe for consumption. All the other ingredients naturally remain the same!