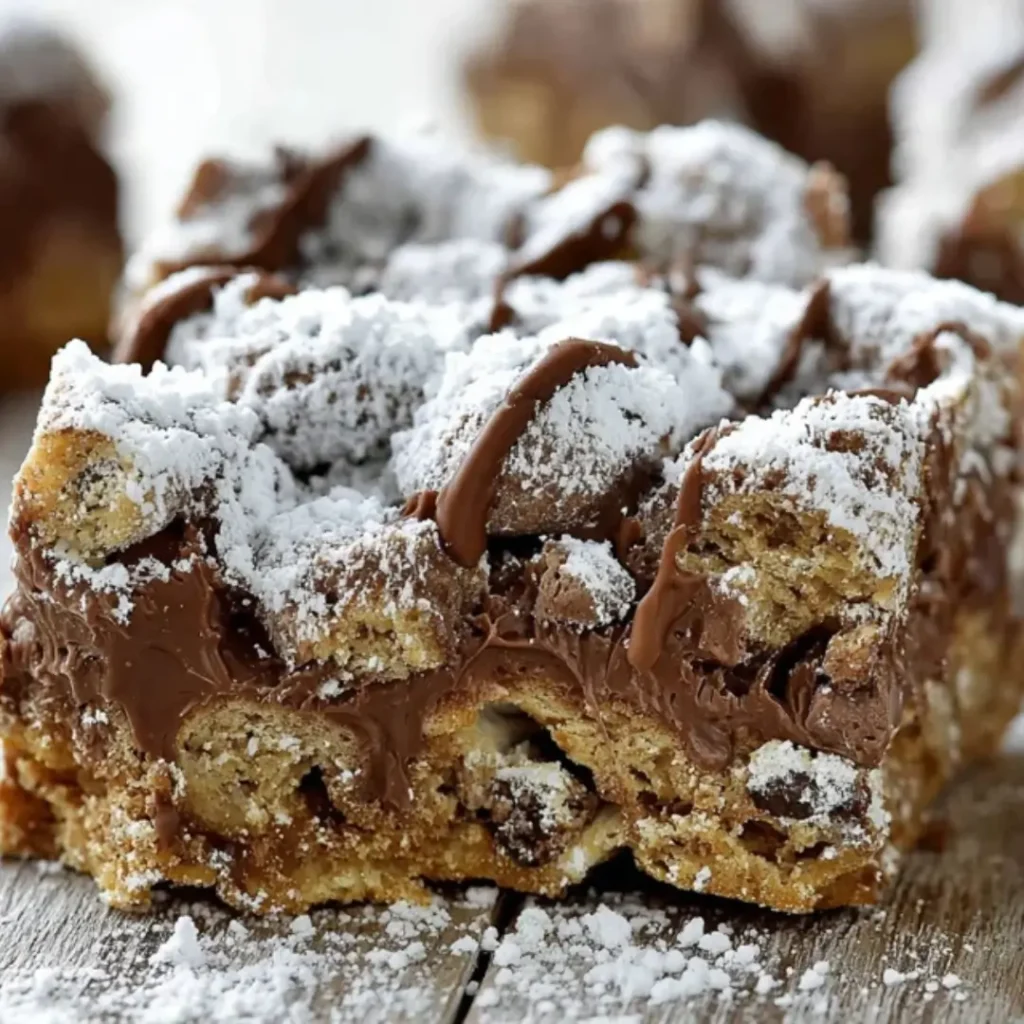
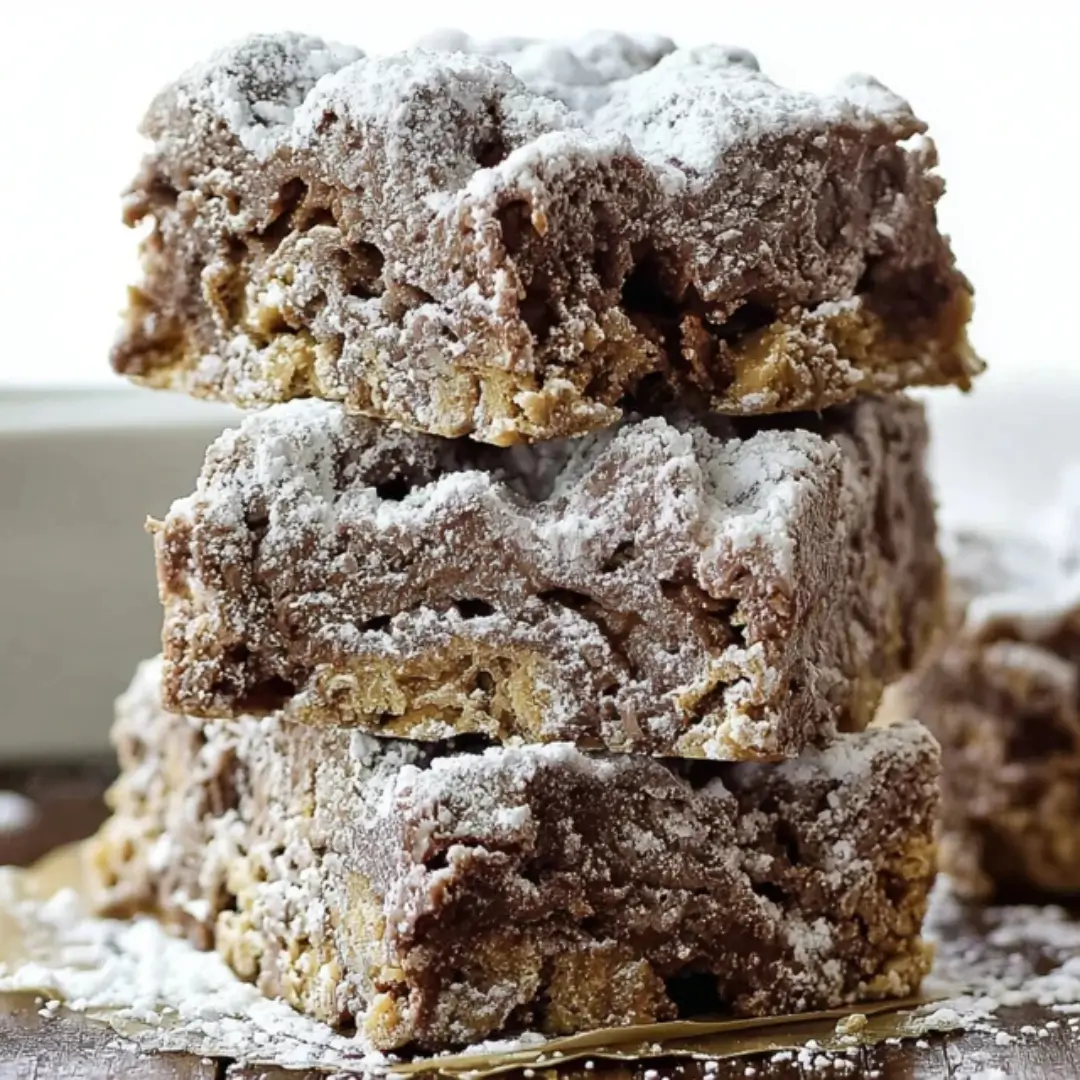
Get ready, because I’m bringing you a total childhood classic reinvented into the most snackable, delicious treat ever: Puppy Chow Bars! If you love the messy, powdered sugar-coated goodness of traditional muddy buddies, you are going to flip for this version. We’ve taken all those iconic peanut butter and chocolate flavors and pressed them into thick, chewy bars that are way less messy but every bit as addictive. Trust me, you’re going to love this—they are the perfect “grab-and-go” sweet treat for when that craving hits!
Why You’ll Love This Recipe
- No-Bake Magic: No need to turn on the oven! This recipe comes together right on the stovetop, making it perfect for hot days or when you need a quick dessert fix.
- The Ultimate Texture: You get that satisfying crunch from the rice cereal mixed with a smooth, velvety peanut butter coating. It’s a total game-changer.
- Kid and Crowd Friendly: Whether it’s a lunchbox surprise or a party platter, these bars disappear in seconds. Everyone loves the nostalgic flavor combo!
Ingredients
Gather up these goodies, and let’s get started!
- Rice Cereal Squares: This provides that essential crunch we all know and love.
- Creamy Peanut Butter: The “glue” that holds everything together while adding that rich, nutty flavor.
- Honey: Adds a natural sweetness and helps the bars stay chewy rather than crumbly.
- Unsalted Butter: Adds a touch of richness and helps create a smooth, melt-in-your-mouth coating.
- Vanilla Extract: Just a splash to enhance all the chocolatey and nutty notes.
- Powdered Sugar: The signature Puppy Chow finish! It adds sweetness and that classic “muddy buddy” look.
- Mini Chocolate Chips: These get tucked into every nook and cranny for chocolate in every bite.
- Milk Chocolate Chips: Adds a boost of creamy chocolate goodness to round out the flavor.
Note: The ingredients with measurements will be right under the article in the recipe card.
How to Make the Puppy Chow Bars Recipe

Step 1: Prep Your Pan
First things first, line an 8×8-inch baking pan with parchment paper. Leave a little overhang on the sides so you can easily lift the bars out later!
Step 2: Melt the Magic
In a medium saucepan over low heat, combine your peanut butter, honey, and butter. Stir it constantly—we want it silky, smooth, and fully melted. Once it’s looking luscious, remove it from the heat.
Step 3: Flavor and Cool
Stir in your vanilla extract. Now, give it just a minute or two to cool slightly. You want it warm enough to pour, but not so hot that it melts your cereal into mush!
Step 4: The Big Mix
Place your rice cereal in a large bowl and pour that golden peanut butter mixture right over the top. Gently fold it all together until every single square is wearing a beautiful peanut butter coat.
Step 5: Sugar and Chocolate
Sprinkle in the powdered sugar and mix until it’s well combined and perfectly sticky. Finally, fold in those mini and milk chocolate chips. Since the mixture is slightly warm, some might melt a little, and that is totally okay—it just adds to the deliciousness!
Step 6: Press and Chill
Transfer the mixture into your prepared pan. Use a spatula (or your hands!) to press it down firmly into an even layer. Pop it in the fridge for at least 1 hour. Once set, lift the parchment paper, slice into bars, and dive in!
Pro Tips for Making the Recipe

- Don’t Crush the Cereal: When folding the mixture, be gentle! You want to keep those cereal squares intact for the best crunch.
- Press Firmly: Really pack the mixture into the pan. This ensures the bars hold their shape when you slice them.
- Warmth Matters: Make sure the peanut butter mixture is still a bit warm when you add the powdered sugar; it helps the sugar “grip” the cereal better.
How to Serve

These bars are stars all on their own, but here are a few ways to level them up:
- The Lunchbox Treat: Wrap them individually for a sweet surprise during the day.
- After-School Snack: Serve them chilled with a cold glass of milk—it’s the ultimate pairing!
- Dessert Platter: Cut them into smaller bite-sized squares and serve alongside fresh strawberries for a party.
Make Ahead and Storage
Storing Leftovers
Keep your bars in an airtight container. They’ll stay fresh and crunchy on the counter for about 3 days, or in the fridge for up to a week.
Freezing
These freeze beautifully! Wrap individual bars in plastic wrap and store in a freezer-safe bag for up to 3 months.
Reheating
No reheating needed! These are best enjoyed chilled or at room temperature to keep that perfect “snap” in the cereal.
FAQs
1. Can I use crunchy peanut butter instead of creamy? Absolutely! If you’re a fan of extra texture, crunchy peanut butter works great. It will just add a little more “oomph” to every bite.
2. Why are my bars falling apart? This usually happens if they weren’t pressed down firmly enough in the pan or if they haven’t chilled long enough. Make sure to give them that full hour in the fridge to set!
3. Can I use different chocolate chips? Of course! Feel free to swap the milk chocolate for dark chocolate if you want a deeper flavor, or even peanut butter chips for a double dose of nuttiness.
4. Is there a substitute for honey? You can use maple syrup or brown rice syrup if you prefer. Just keep in mind it might slightly change the flavor profile, but it will still be delicious!
Puppy Chow Bars
Ingredients
Equipment
Method
- Line an 8×8-inch baking pan with parchment paper and set aside.
- In a saucepan over low heat, melt together the peanut butter, honey, and butter, stirring constantly until smooth.
- Remove from heat, stir in vanilla extract, and allow to cool slightly.
- Place the rice cereal in a large bowl and pour the warm peanut butter mixture over it. Fold gently to coat.
- Add powdered sugar and mix until evenly combined and slightly sticky.
- Fold in the mini chocolate chips and milk chocolate chips.
- Press the mixture firmly into the prepared pan in an even layer.
- Refrigerate for at least 1 hour until set. Cut into bars and serve.