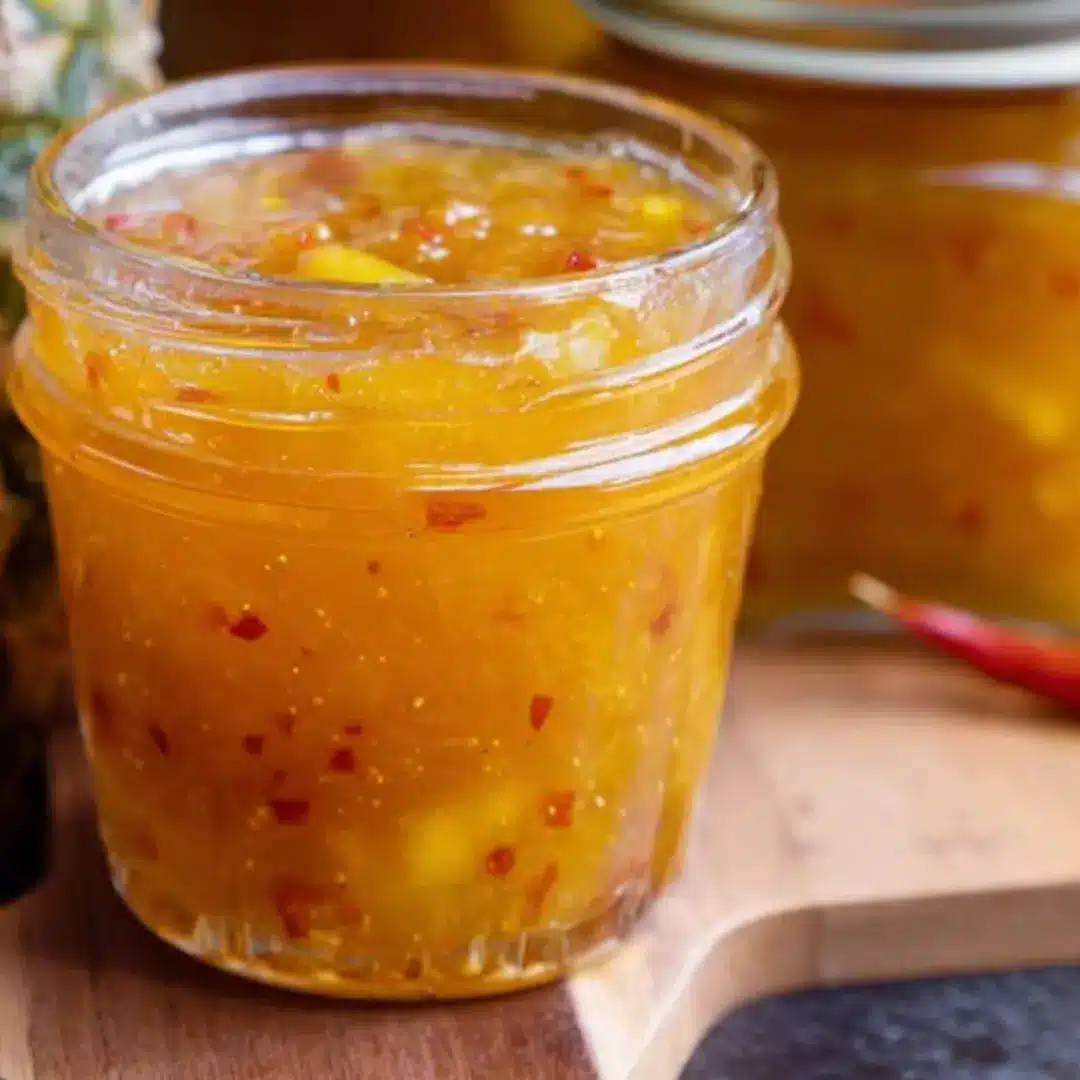
Today I’m bringing you a truly luscious and fiery-sweet condiment that is about to become your new kitchen obsession! This homemade Sweet Chilli Pineapple Sauce is a perfect blend of tropical sweetness, bright citrus, and a gentle kick of heat. Trust me, nothing beats the vibrant flavour of homemade chilli sauce, and preserving it means you can enjoy that summer taste all year long. It’s absolutely fantastic on everything from grilled chicken to spring rolls, and it’s a super fun project for a weekend afternoon. Get ready to can a batch of sunshine!
Why You’ll Love This Recipe
- Tropical Flavour Bomb: The combination of sweet pineapple and vibrant chilli is a legendary pairing, delivering a sauce that is addictive and complex.
- Zero Mystery Ingredients: You get to control the heat level and know exactly what is going into your sauce—just fresh, fantastic ingredients.
- The Ultimate Gift: Preserving this sauce in jars makes it a beautiful, thoughtful, and much-appreciated homemade gift for the foodies in your life.
- Versatile Kitchen Staple: This sauce is a truly flexible condiment that works wonders as a glaze, a dip, or a quick addition to stir-fries.
Ingredients
All you need for this bright and beautiful sauce is a little time and a few fresh ingredients. Let’s gather up our flavour makers!
- Fresh Pineapple (Finely Diced): This is the sweet and tropical star of the show! Dicing it finely helps it break down beautifully to create a luscious texture.
- Pineapple Juice: Keeps our sauce juicy and intensifies that wonderful tropical flavour.
- Fresh Red Birds-Eye Chillies (Minced): These little firecrackers bring the heat! Remember to wear gloves when handling and mincing to protect your skin.
- Garlic (Minced): Every great savoury sauce needs garlic! It adds a warm, aromatic depth that balances the sweetness.
- White Vinegar (5% Acidity): This is absolutely essential for both the flavour balance (it cuts through the sweetness) and, most importantly, for safe home canning.
- Lime Zest & Lime Juice: The bright, zesty flavour of lime elevates the sauce and adds a necessary pop of acidity that makes the whole thing sing.
- Granulated Sugar: Sweetness is a key component of any ‘sweet chilli’ sauce, helping to balance the vinegar and heat.
- Salt: Just a pinch to enhance and sharpen all the other flavours.
- Chilli Flakes (Optional): If you like things a little extra fiery, this is your secret weapon for an added layer of heat and visual appeal.
- Cornstarch & Cold Water (Slurry): This is our little trick for achieving that perfect, silky, syrupy consistency without having to reduce the sauce forever.
Note: The exact measurements for these ingredients, along with the full recipe instructions, will be right under the article in the recipe card!
How to Make the Sweet Chilli Pineapple Sauce
Trust me, this process is way easier than you think, and the payoff is unreal.
Step 1: Prep the Jars for Canning
First things first, let’s get our jars ready! You’ll want to wash your half-pint (8 oz) jars and lids in hot soapy water. Rinse them super well, then keep them submerged in simmering water to sterilise them and keep them hot until you’re ready to fill them.
Step 2: Combine and Boil the Flavours
Grab a nice, heavy-bottomed saucepan and set it over medium heat. Toss in the diced pineapple, pineapple juice, minced chillies, garlic, vinegar, lime zest and juice, sugar, and salt. Give it a good stir to combine everything. Bring this gorgeous mixture up to a rolling boil, stirring frequently to make sure nothing sticks.
Step 3: Simmer and Flavour Meld
Once you hit that boil, lower the heat to a simmer. Let it bubble gently for about 10 minutes, making sure to stir often. During this time, the mixture will thicken slightly, and all those amazing ingredients will get to know each other, developing a deep, melded flavour.
Step 4: Thicken with the Slurry
In a tiny bowl, mix the cornstarch with the cold water until it’s perfectly smooth—this is your thickening slurry! Stir the slurry into the simmering saucepan. Continue to cook for another 2-3 minutes. You’ll see the sauce transform into that perfect, beautiful syrupy consistency that’s still pourable but clings nicely to a spoon. Remove it from the heat.
Step 5: Ladle, Bubble, and Seal
Ladle the hot, magnificent sauce into your hot, sterilised jars. Be sure to leave about a half-inch of headspace (that’s the space between the sauce and the top of the jar rim). Use a small tool to remove any air bubbles, wipe the rims clean (super important!), and screw the lids on until they are just fingertip-tight.
Step 6: Process for Shelf-Stable Goodness
Carefully place your filled jars into a boiling-water canner, ensuring they are covered by at least one inch of water. Bring the water back up to a rolling boil and process the half-pint jars for 15 minutes (remember to adjust this time if you live at a higher altitude!).
Step 7: Cool and Check the Seal
Turn off the heat and let the jars hang out in the hot water for 5 minutes. Then, remove them and place them on a rack or towel to cool completely, undisturbed, for 12 to 24 hours. Once they are cool, check the seal! The centre of the lid should be concave and shouldn’t flex up or down when you press on it. If it doesn’t seal, just pop it in the fridge!
Step 8: Store and Enjoy!
Label your sealed jars and store them in a cool, dark place. Once you finally crack one open, be sure to keep it refrigerated—but honestly, it probably won’t last long!
Pro Tips for Making the Recipe
- Mind the Chillies: If you prefer a milder sauce, you can remove the seeds and membranes from the birds-eye chillies before mincing them. If you love the heat, leave them in!
- Keep Everything Hot: For a safe and successful seal when canning, it’s crucial that both the sauce and the jars are hot when you combine them. Never ladle hot sauce into a cold jar!
- The Right Tool for Bubbles: Use a wooden chopstick or a plastic canning tool to gently release any air bubbles trapped in the sauce after filling the jar. Don’t use metal, as it can scratch the glass.
- Vinegar Acidity Matters: For safe canning, make sure you are using white vinegar that is at least 5% acidity. It’s non-negotiable for preservation safety!
How to Serve
This is one of the most versatile sauces you will ever make! It’s bright, complex, and goes with just about everything.
- The Perfect Dip: Serve it chilled as a dipping sauce for classics like crispy spring rolls, fresh shrimp, chicken tenders, or homemade wontons.
- A Fantastic Glaze: Brush it onto chicken wings, pork chops, salmon, or grilled tofu in the last few minutes of cooking for a glossy, sweet-and-spicy finish.
- Sandwich and Burger Upgrade: Use it as a vibrant spread on a turkey sandwich, a tropical burger (hello, Hawaiian Burger vibes!), or even a gooey grilled cheese.
- Cheese Board Staple: Place a small bowl of it on your next cheese and charcuterie board. It pairs beautifully with sharp cheddar, brie, and goat cheese.
Make Ahead and Storage
This recipe is practically designed for making ahead, which is why we’re canning it!
Storing Leftovers (Unsealed Jars)
Any jars that didn’t seal (or if you made a batch just for immediate use!) should be stored in the refrigerator. The sauce will keep in an airtight container for up to 3 weeks.
Freezing (Not Recommended)
While you can technically freeze sauces, canning is the preferred method here for long-term storage and maintaining the best texture and flavour. Freezing can sometimes mess with the cornstarch-thickened consistency.
Reheating
This sauce is traditionally served cold or at room temperature as a condiment, dip, or glaze. No need to reheat sealed jars! If you want to use it warm (say, as a drizzle over rice), you can gently warm the needed amount in a small saucepan.
FAQs
1. Can I use frozen or canned pineapple instead of fresh?
Absolutely! While fresh pineapple gives the most vibrant flavour, you can totally use canned or frozen. If using canned, be sure to drain the chunks well before dicing, but you can use the liquid as your pineapple juice in the recipe. If using frozen, let it thaw completely first.
2. How can I adjust the heat level of this sauce?
It’s super easy to customise the spice! To make it milder, reduce the number of chillies to two, or remove all the seeds and membranes. To make it much spicier, you can use six or more chillies, and definitely include that optional teaspoon of red chilli flakes! Taste a tiny bit of the sauce before you thicken it to see if it meets your desired heat.
3. What happens if my jar lids don’t “pop” or seal properly?
Don’t panic! If a lid doesn’t seal (meaning the centre of the lid still flexes up and down after cooling for 24 hours), it just means that jar isn’t safe for shelf storage. You can simply treat it like a regular leftover. Keep that jar in the refrigerator and plan to use it within 3 weeks.
4. Can I skip the canning process and just make a small batch for the fridge?
Yes, you can! If you just want a small, immediate batch, skip steps 1, 6, 7, and 8. Just let the sauce cool completely, then transfer it to an airtight container and store it in the refrigerator for up to 3 weeks. The canning is only necessary if you want a shelf-stable product.
Canning Sweet Chilli Pineapple Sauce
Ingredients
Equipment
Method
- Prepare all ingredients. Sterilize canning jars and lids according to standard canning safety practices.
- In a large saucepan, combine pineapple, sugar, vinegar, red pepper, chili peppers, garlic, and ginger.
- Bring to a boil over medium-high heat, stirring occasionally. Reduce heat and simmer for 30–35 minutes until thickened and aromatic.
- Use a blender or immersion blender to puree the sauce to desired consistency. Return to heat.
- If you prefer a thicker sauce, stir in the cornstarch slurry and simmer for an additional 5 minutes.
- Ladle the hot sauce into sterilized jars, leaving 1/4-inch headspace. Seal and process in a boiling water bath for 10 minutes.
- Remove jars and let cool completely. Store in a cool, dark place for up to 1 year.