Today I’m bringing you a truly luxurious treat that takes the classic chocolate chip scone and gives it a little extra oomph: the delightful tang of sourdough! Trust me, this Sourdough Chocolate Chip Scone Recipe is a game-changer. It delivers those irresistible buttery, flaky layers we all adore in a scone, but the sourdough starter adds a subtle depth of flavor that keeps you coming back for more. They’re soft, sweet, loaded with melty chocolate chips, and honestly, they feel like a warm hug on a plate. This is one of those recipes that proves baking doesn’t have to be fussy—it’s pure, homemade joy!
Why You’ll Love This Recipe
- The Sourdough Secret: Even if you use discard, the sourdough starter adds a beautiful, subtle tanginess that perfectly balances the sweetness of the chocolate chips. It makes the flavor so much more complex!
- Irresistibly Flaky: The technique keeps the butter cold, resulting in tall, tender, and incredibly flaky scones. Say goodbye to dry, crumbly scones forever!
- Quick & Easy: Seriously, you can have these gorgeous baked treats ready in about 35 minutes flat. Perfect for a lazy weekend brunch or a spontaneous afternoon craving.
- Chocolate Chip Heaven: Let’s be honest, everything is better with gooey, melted chocolate chips! They transform a simple scone into a decadent experience.
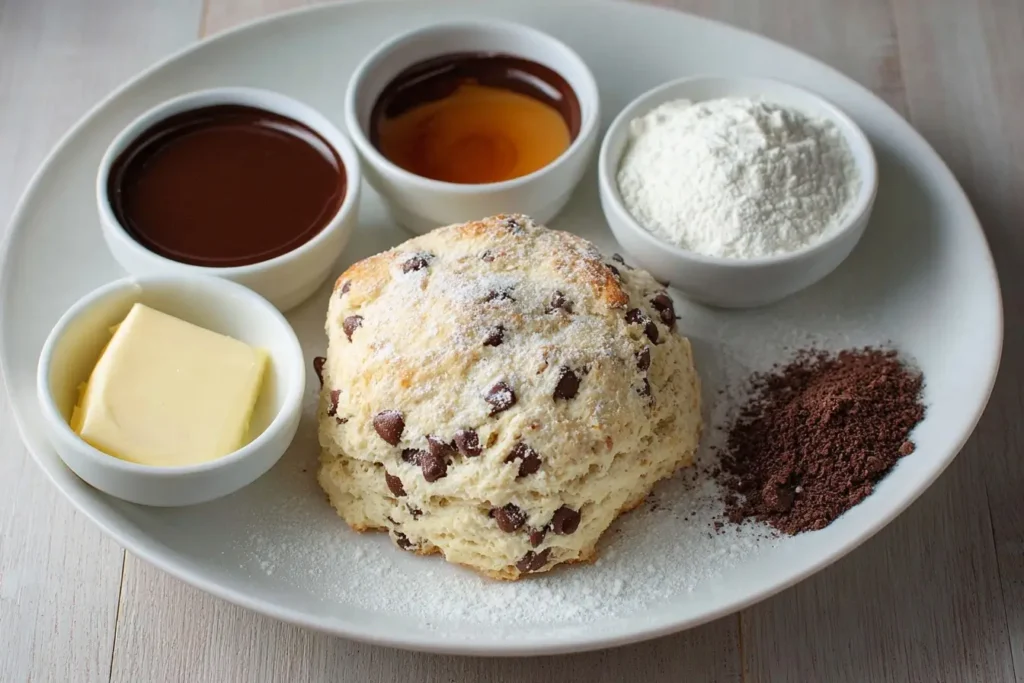
Ingredients
Gathering up your ingredients is the first step to scone happiness! You’ll need a few basics, but the star is definitely that bubbly sourdough starter.
- All-Purpose Flour: This is the foundation of our lovely baked good! It provides the structure for those tender, high-rising layers.
- Granulated Sugar: Just enough sweetness to balance the sourdough tang and make the chocolate chips pop!
- Baking Powder: The main leavening agent that helps our scones rise tall and fluffy. Don’t skip this for maximum lift!
- Salt: Essential for flavor! It balances the sugar and enhances the buttery richness of the dough.
- Cold Unsalted Butter, Cubed: This is the key to flakiness! Keeping it ice-cold before cutting it in creates those beautiful, delicate layers as the steam escapes during baking.
- Active Sourdough Starter (or Discard): Our special ingredient! It adds moisture and that signature fermented flavor complexity that makes these stand out.
- Cold Milk or Cream: Provides moisture and richness. Keep it cold, just like the butter, to maintain the right dough temperature.
- Large Egg: Acts as a binder and adds richness and color to the final scone.
- Vanilla Extract: A splash of warmth to deepen the overall flavor profile.
- Chocolate Chips: Use your favorite! Semisweet or dark chocolate works wonders here for that classic contrast.
- Optional: Milk for Brushing Tops: A quick brush helps them achieve that beautiful, golden-brown shine in the oven.
Note: The exact measurements for these ingredients, along with the full nutritional information, will be found right under this article in the recipe card!
How to Make the Sourdough Chocolate Chip Scone
This recipe is surprisingly quick, so let’s jump in! Getting these delicious treats on your table in under an hour is totally doable.
Step 1: Prep and Whisk Dry Ingredients
First things first, get your oven cranking to 400°F (200°C). Line a baking sheet with parchment paper—this makes cleanup a breeze! In your biggest bowl, whisk together the flour, sugar, baking powder, and salt until they are perfectly combined.
Step 2: Cut in the Cold Butter
This step is crucial for flakiness! Add your super cold, cubed butter into the dry mixture. Use a pastry cutter or even just your fingertips to quickly work the butter into the flour until the mixture resembles coarse, pea-sized crumbs. Remember: the colder the butter, the flakier the scone!
Step 3: Combine Wet Ingredients
In a separate bowl, whisk together your sourdough starter, cold milk (or cream), egg, and vanilla extract. Give it a good whisk until it’s smooth and ready to go!
Step 4: Gently Mix the Dough
Pour the wet ingredients into your dry mixture. Mix very gently until the ingredients are just combined. The goal is to avoid overmixing, which can lead to tough scones. A few streaks of flour are totally fine!
Step 5: Fold in the Chocolate
Gently fold in all those glorious chocolate chips. Work quickly and keep that mixing minimal. You want a shaggy, slightly sticky dough—don’t try to make it smooth!
Step 6: Shape and Cut
Turn the dough out onto a lightly floured surface. Gently press and shape it into a round disc, about 1 inch thick. Now, using a sharp knife or bench scraper, cut the disc into 8 equal wedges. Transfer these beautiful wedges to your prepared baking sheet.
Step 7: Brush and Bake
If you want those picture-perfect golden tops, brush them lightly with that extra tablespoon of milk. Pop them into the preheated oven for 18-22 minutes, or until they are gorgeously golden brown and set through the middle.
Step 8: Cool Slightly and Devour
Let them cool on the tray for just a few minutes—you absolutely want to enjoy these warm for that ultimate melt-in-your-mouth experience! They are truly best enjoyed fresh.
Pro Tips for Making the Recipe
- Keep Everything Cold: I cannot stress this enough! Use cold butter, cold milk, and even chill your mixing bowl for a few minutes. This ensures the butter doesn’t melt before it hits the oven, which is the secret to a high rise and flaky texture.
- Don’t Overmix: Overmixing develops the gluten, leading to a tough, bready scone instead of a tender, flaky one. Mix just until the wet and dry ingredients come together.
- Use Active or Discard Starter: This recipe is super flexible! You can use active, fed starter or sourdough discard. The flavor difference is minimal, so use whatever you have on hand.
- For a Thicker Crust: To get that slightly thicker, crunchier crust, make sure you use a sharp knife or bench scraper to cut the wedges cleanly. Don’t saw at the dough!
How to Serve

These scones are spectacular on their own, fresh out of the oven, but they also pair beautifully with simple additions!
- Keep it Classic: Serve them warm alongside a cup of your favorite strong coffee or hot tea. It’s a perfect breakfast or afternoon pick-me-up.
- Cream and Jam: You can never go wrong with a traditional scone setup! A dollop of clotted cream (or even just whipped cream) and a spoonful of raspberry or strawberry jam is pure bliss.
- Icing Drizzle: For an extra sweet treat, whisk together a quick powdered sugar glaze (powdered sugar + a splash of milk) and drizzle it over the cooled scones.
Make Ahead and Storage
Storing Leftovers
If you happen to have any of these amazing scones left over (a big “if” in my house!), store them in an airtight container at room temperature for up to 2-3 days.
Freezing
You can freeze these both baked or unbaked!
- Unbaked: Shape and cut the wedges, then place them on a baking sheet and freeze until solid. Transfer the frozen, raw wedges to a freezer bag and store for up to 3 months. Bake from frozen, adding about 5-10 minutes to the baking time.
- Baked: Cool completely, wrap tightly in plastic wrap, and place in a freezer bag for up to 3 months.
Reheating
The best way to bring that fresh-baked joy back is to reheat them! Pop leftover baked scones into a 350°F (175°C) oven for about 5-8 minutes until warmed through. They’ll crisp up slightly and taste nearly as good as day one!
FAQs
1. Is it safe to use sourdough discard in this recipe?
Yes, absolutely! Sourdough discard is perfect for recipes that use baking soda or baking powder for lift, like scones, quick breads, and pancakes. The baking powder is what provides the main rise here, while the discard contributes that wonderful depth of flavor and moisture without needing to be active or fully fed. It’s a fantastic way to use up that discard and prevent food waste!
2. Can I substitute the chocolate chips with other mix-ins?
Go for it! This recipe is incredibly versatile, making it easy to swap out the chocolate chips for other delicious mix-ins. Try adding dried cranberries, blueberries (fresh or frozen), chopped nuts like pecans or walnuts, or even a different type of chip, like butterscotch or white chocolate. Just keep the total quantity of mix-ins around 3/4 to 1 cup to maintain the dough structure.
3. Why do I need to keep the butter so cold?
The temperature of the butter is the secret to flaky scones! When cold cubes of butter hit the hot oven, the moisture inside them turns instantly into steam, pushing apart the layers of dough. This creates air pockets and results in those high, light, and flaky layers. If the butter is too warm, it melts into the dough before baking, resulting in a flatter, denser, and tougher texture.
4. How can I tell when the scones are done baking?
Your Sourdough Chocolate Chip Scones are ready when they are beautifully golden brown on the outside. They should also feel firm to the touch, especially in the center. If you press lightly on the side of a scone, it should hold its shape and not feel jiggly or raw inside. The cooking time of 18-22 minutes is a great guideline, but always rely on those visual cues!

Sourdough Chocolate Chip Scone
Ingredients
Equipment
Method
- Preheat oven to 400°F (200°C) and line a baking sheet with parchment paper.
- In a large bowl, whisk together flour, sugar, baking powder, and salt.
- Add the cold cubed butter and cut it into the flour mixture until crumbly.
- In a separate bowl, whisk together sourdough starter, milk, egg, and vanilla extract.
- Pour the wet ingredients into the dry ingredients and gently mix until just combined.
- Fold in the chocolate chips, being careful not to overmix.
- Turn the dough out onto a lightly floured surface and shape into a 1-inch thick disc.
- Cut into 8 wedges and place on the prepared baking sheet.
- Brush tops lightly with milk if desired and bake for 18–22 minutes until golden.
- Cool slightly before serving. Enjoy warm for best texture.