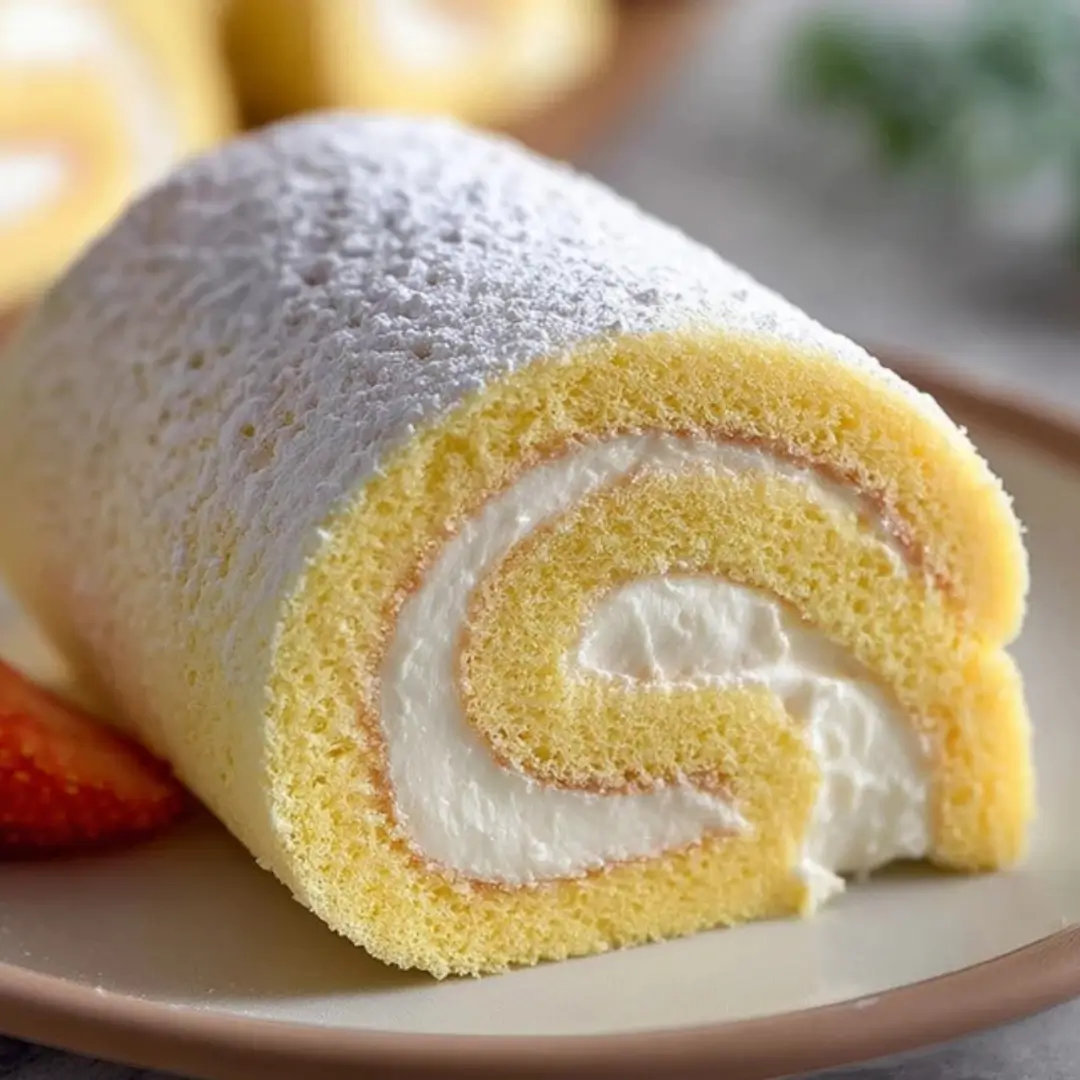
This Japanese Swiss Roll Cake, or “roll cake” as it’s often called, is a masterclass in lightness! Forget those heavy, dense sponge cakes; this one is impossibly soft, airy, and bouncy, and it hugs a dreamy, barely-sweetened whipped cream filling. Ready in just about 30 minutes, this cake is the perfect treat when you need a dessert that feels elegant but is totally approachable to make at home. Get ready to fall in love with its delicate sweetness and cloud-like texture!
Why You’ll Love This Recipe
- Cloud-Like Texture: The secret is in the meringue! This cake is unbelievably soft, airy, and moist—it truly melts in your mouth. You have to try it to believe it!
- Perfectly Balanced Sweetness: Unlike many Western desserts, this cake is subtly sweet, letting the pure flavor of the vanilla and the fresh cream shine through. It’s addictively light!
- Simple Elegance: While it looks impressive, the rolling technique is much easier than you think. You’ll feel like a pastry pro when you slice into this beautiful swirl.
- Quick to Make: From prep to oven, this cake is ready in under 30 minutes. It’s a fabulous last-minute treat for a gathering or just a special weeknight dessert.
Ingredients
All you need to whip up this light and dreamy Japanese Swiss Roll Cake are a few pantry staples and a little bit of rolling confidence! But first, gather up these essential ingredients:
- Large Eggs (Separated): The absolute key! Separating the yolks and whites allows us to create both richness (yolks) and that incredible, airy volume (whites).
- Granulated Sugar (Divided): Used to sweeten and stabilize both the yolk batter and the all-important meringue, giving the cake its structure.
- Milk & Vegetable Oil: This adds the essential moisture and tenderness to the cake. The oil helps keep the crumb soft and pliable, which is crucial for rolling!
- Vanilla Extract: The classic aromatic foundation! It imparts a lovely, warm fragrance to both the cake and the filling.
- Cake Flour (Sifted): The secret to the lightest texture. Sifting ensures there are no lumps and incorporates air, giving you that quintessential Japanese sponge cake fluffiness.
- Cream of Tartar & Pinch of Salt: These are the unsung heroes of the meringue! They help stabilize the egg whites, ensuring they whip up to strong, glossy, and reliable stiff peaks.
- Heavy Cream: The base of our luxurious filling! It whips up beautifully into a stable cream.
- Powdered Sugar (for Filling): Dissolves instantly and adds just a touch of delicate sweetness to the filling without weighing it down.
P.S. You can find the full list of ingredients with all the exact measurements in the printable recipe card right below this article!
How to Make the Japanese Swiss Roll Cake
We’re going to treat this cake gently because we want to keep all that beautiful air we’re whipping into it! Follow these steps, and you’ll have a gorgeous roll cake in no time.
Step 1: Prep the Oven and Mix the Yolks
Preheat your oven to 350∘F (175∘C). Line a 10×15 inch jelly roll pan with parchment paper, leaving a slight overhang (this helps with lifting later!). In a bowl, grab your egg yolks and half of the sugar. Whisk these together until they turn pale yellow and look thick and creamy. Next, whisk in the milk, vegetable oil, and vanilla extract until completely smooth.
Step 2: Fold in the Flour
Carefully sift the cake flour directly over the yolk mixture. Using a spatula, gently fold the flour in. Remember, we want to mix until just combined—don’t overmix it, or you’ll develop the gluten and lose the cake’s signature softness. Set this beautiful yolk batter aside.
Step 3: Whip the Meringue
In a completely clean, grease-free bowl, beat your egg whites with the cream of tartar and salt until they become foamy. Now, gradually rain in the remaining sugar while you continue beating until those coveted stiff peaks form. When you lift the whisk, the peaks should stand straight up and hold their shape!
Step 4: Lighten and Combine the Batter
This is where the magic happens! Gently fold about one-third of the stiff meringue into the yolk mixture. This “lightens” the yolk batter and makes it easier to fold without deflating the rest of the meringue. Then, carefully fold in the remaining meringue in two additions, using a light, circular motion. Stop mixing as soon as no streaks of white are visible.
Step 5: Bake and Cool
Pour the batter into your prepared pan and use an offset spatula to spread it into an even layer. Give the pan a light tap on the counter to release any large air bubbles. Bake for 12−14 minutes, or until the surface is lightly golden and bounces back when you gently touch it. Immediately invert the cake onto a clean piece of parchment paper, peel off the baking parchment, and then (while it’s still warm!) roll the cake up gently along with the clean parchment paper. Let it cool completely in this rolled shape—this trains the cake and prevents cracking later.
Step 6: Make the Cream Filling
While the cake cools, make your filling! In a chilled bowl, beat the heavy cream, powdered sugar, and vanilla extract until soft peaks form. We want it silky and spreadable, not overly stiff.
Step 7: Assemble and Chill
Carefully unroll the cooled cake. Spread that dreamy whipped cream evenly over the surface, leaving a small border at the end. Gently and snugly roll the cake back up, starting from the short end. Wrap it tightly in parchment and pop it in the fridge for 1−2 hours. This chill time sets the cream and helps the cake hold its perfect roll shape for easy slicing.
Pro Tips for Making the Recipe
- The Meringue is Key: Ensure your egg whites are at room temperature and your bowl is completely grease-free! Any trace of fat can prevent the whites from reaching stiff peaks.
- Roll While Warm: Don’t wait! Rolling the cake immediately after it comes out of the oven, while it’s still warm and flexible, is the secret to preventing it from cracking. Use the parchment paper to help guide the roll.
- Don’t Overbake: Overbaking is the enemy of a soft, rollable cake. Keep a close eye on it; it should be lightly golden and spring back lightly when touched, but still feel tender.
- Sifting is Non-Negotiable: If the recipe calls for sifting the cake flour, you absolutely should! It’s the easiest way to guarantee that incredibly light and airy texture.
How to Serve
This delicate Japanese Swiss Roll is truly divine on its own, but here are a few ways to elevate the serving experience:
- Simple Powder: For an elegant finish, dust the top of the chilled cake with a whisper of powdered sugar right before slicing.
- Fresh Fruit: Pair a slice with beautiful, colorful berries like strawberries, blueberries, or raspberries. They add a lovely tart contrast to the sweetness of the cake.
- Tea Time: This cake is the ultimate companion to a cup of hot green tea or your favorite afternoon Earl Grey. The lightness of the cake balances the warmth of the tea perfectly.
Make Ahead and Storage
Storing Leftovers
Leftovers should be stored in an airtight container in the refrigerator. Due to the fresh cream filling, it will stay delicious for up to 3 days.
Freezing
While the cake itself can be frozen (wrapped tightly, without the filling), the fully assembled cake with the whipped cream filling does not freeze well. The cream can become watery upon thawing. It’s best enjoyed fresh!
Reheating
No need! This is a cold, refrigerated dessert. Just pull it out of the fridge, slice, and enjoy!
FAQs
1. Why did my cake crack when I tried to roll it?
There are two main culprits here: The most common is overbaking—a dry cake will always crack. Make sure you pull it out right at the 12−14 minute mark! The second reason is letting it cool completely before rolling. You must roll the warm cake with the parchment paper to “train” it into its new shape; then, let it cool completely.
2. Can I use all-purpose flour instead of cake flour?
You can, but I highly recommend sticking to cake flour! Cake flour has a lower protein content, which is key to achieving that signature, super-soft, and light-as-air crumb that Japanese-style desserts are famous for. If you must use all-purpose, replace 1/2 cup of all-purpose flour with 1/2 cup minus two tablespoons, and then add two tablespoons of cornstarch to try and mimic the low-protein nature of cake flour.
3. What can I add to the filling for extra flavor?
Oh, that’s a fun one! You can easily swap the vanilla extract for a bit of matcha powder (sifted in), a few drops of almond extract, or even fold in some finely crushed espresso powder for a coffee kick. You can also mix in very finely chopped strawberries or raspberries.
4. How can I tell when my meringue has reached “stiff peaks”?
Stiff peaks are perfect when you lift the whisk or beaters and the peaks stand up straight without bending over at all. If the peak droops slightly, that’s a “soft peak.” Make sure they are stiff, glossy, and hold their shape—this guarantees your cake will have that beautiful, airy structure!
Japanese Swiss Roll Cake
Ingredients
Equipment
Method
- Preheat oven to 350°F (175°C). Line a 10×15-inch baking sheet with parchment paper.
- In a bowl, whisk together egg yolks, 40g sugar, milk, oil, and vanilla until smooth. Gently fold in sifted cake flour until combined.
- In a separate bowl, beat egg whites until foamy. Gradually add remaining 30g sugar and continue beating until soft peaks form.
- Fold the egg whites gently into the yolk mixture in three additions until no streaks remain.
- Pour batter into prepared pan and spread evenly. Tap the pan lightly to remove air bubbles.
- Bake for 12–15 minutes, or until lightly golden and the top springs back when touched.
- Remove from oven, cover with parchment, and let cool completely.
- For the cream: beat cold cream, powdered sugar, and vanilla until stiff peaks form.
- Peel off the parchment from the cake. Spread whipped cream evenly over the sponge, then roll it up gently from the short end using the parchment paper to guide.
- Wrap in parchment and chill for at least 1 hour before slicing.