This Christmas Tree Cupcakes recipe offers the ultimate combination of fluffy, tender vanilla cake and rich, creamy buttercream, all dressed up for the holidays! Nothing says festive cheer like a beautifully decorated dessert, and this easy recipe is designed to bring a big smile to the faces of your family and friends. Ready in about 40 minutes, they’re the perfect seasonal project!
Why You’ll Love This Recipe
- Ultimate Holiday Joy: These aren’t just cupcakes—they’re mini edible Christmas trees! They immediately elevate any dessert table and make for a fantastic holiday activity.
- The Best Texture: We’re using a secret weapon: sour cream! It keeps the vanilla cake base incredibly moist, tender, and perfectly balanced, making it hard to stop at just one.
- Simple Showstopper: While they look fancy, the process is straightforward. A little green dye and some easy piping turn a basic cupcake into a beautiful centerpiece.
- Highly Customizable: You get to be the head decorator! Change up the sprinkles, add different toppings, or play with the shade of green—it’s your holiday canvas.
Ingredients
All you need for this fun, festive baking adventure is about 20 minutes of prep time! Before you start, gather up these key players. We’re focusing on why they matter to the final result:
- All-Purpose Flour, Baking Powder, and Salt: This is the basic dry structure for our fluffy cake base. The baking powder gives us that beautiful, domey lift we want in a perfect cupcake.
- Unsalted Butter (Cake): Provides a rich, tender crumb. Make sure it’s properly softened! This is key for creaming it with the sugar to incorporate air for a light texture.
- Granulated Sugar: Not just for sweetness! It also helps tenderize the batter and keep the cupcakes moist.
- Large Eggs: Our essential binder! They add richness and structure—add them one at a time to ensure they emulsify properly.
- Vanilla Extract (Cake): The foundation of all great baking. Use a good quality one for the best flavor lift.
- Milk and Sour Cream: The moisture dream team! The sour cream is the game-changer here, adding a subtle tang and ensuring your cupcakes stay soft and moist for days.
- Green Food Coloring: This turns our creamy vanilla frosting into a beautiful, festive shade of evergreen. Gel coloring works best for intense color without thinning the frosting.
- Unsalted Butter (Frosting): This forms the rich, velvety base of our buttercream. Cream it well before adding the sugar!
- Powdered Sugar: Gives the frosting its classic sweetness and structure. Sifting it will ensure a smooth, lump-free buttercream.
- Heavy Cream: Helps thin the buttercream just slightly to make it pipeable, while also adding extra richness and creaminess.
- Vanilla Extract (Frosting): Just a touch more vanilla enhances the buttery flavor of the frosting.
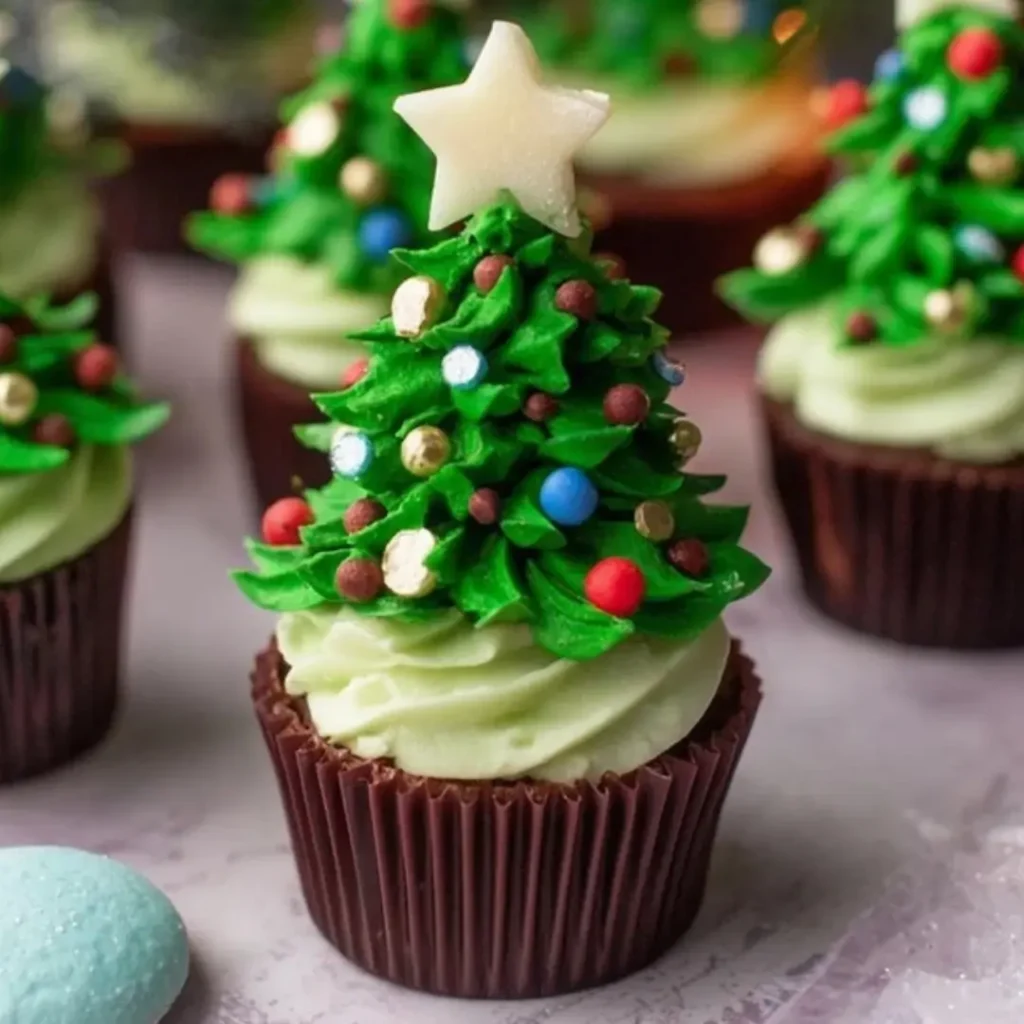
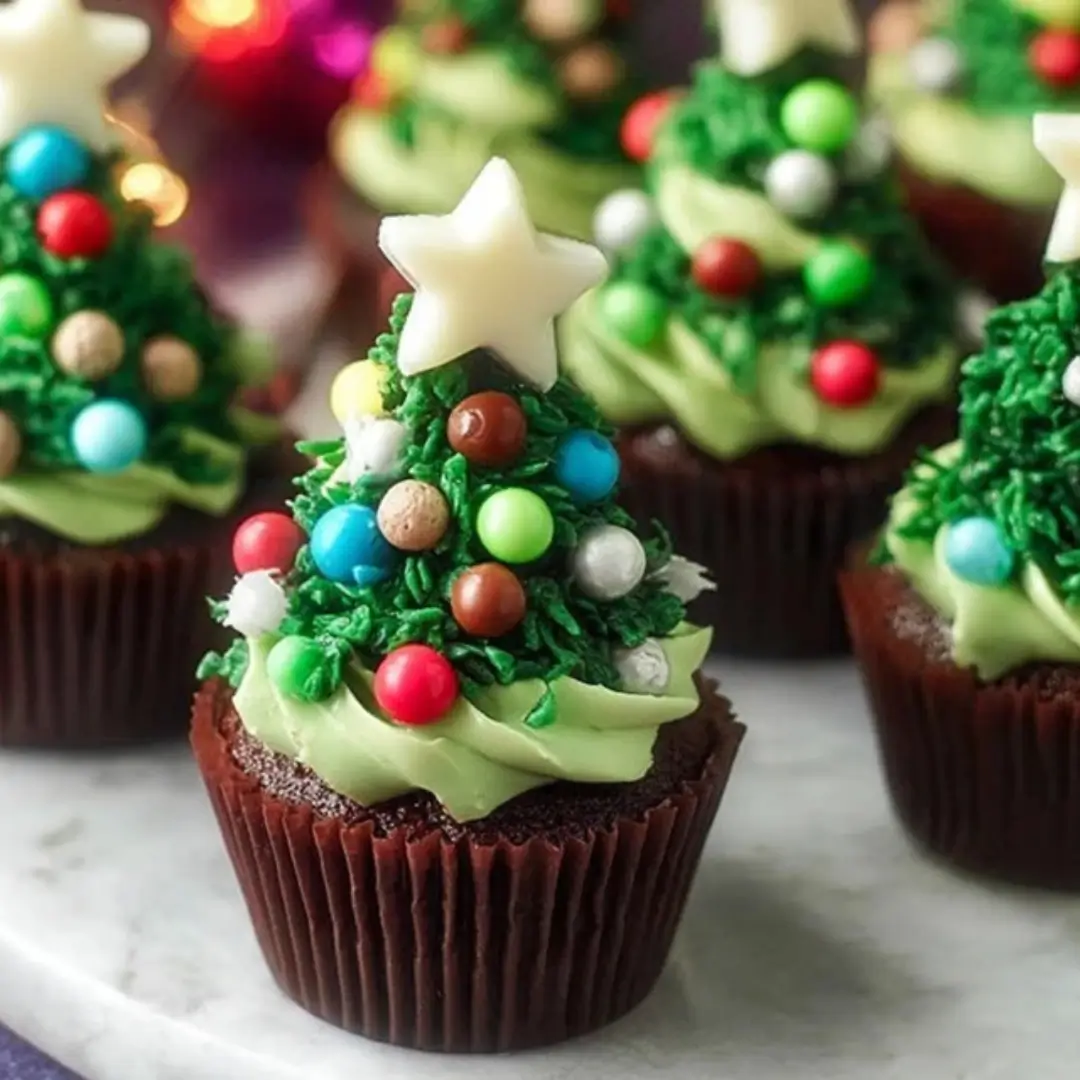
- Assorted Sprinkles or Edible Pearls: Your little “ornaments”! Small, round, colorful sprinkles work wonderfully to give that decorated tree effect.
- Mini Star-Shaped Candies: The essential finishing touch—no tree is complete without a star on top!
Quick Note: The exact measurements for all of these fantastic ingredients will be right under this article in the recipe card!
How to Make the Christmas Tree Cupcakes
You’ll be surprised how quickly these festive delights come together. The key is in the creaming and the piping!
Step 1: Prep the Oven and Dry Ingredients
Preheat your oven to a nice and cozy $350^\circ\text{F}$ ($175^\circ\text{C}$). Go ahead and line your 12-cup muffin tin with liners. In a medium bowl, whisk together your flour, baking powder, and salt. Set that aside—we’ll be using it soon!
Step 2: Cream and Mix the Wet Ingredients
In a large bowl (use a stand mixer or a hand mixer!), beat your softened butter and granulated sugar until the mixture looks pale, light, and wonderfully fluffy. Next, add the eggs, one at a time, making sure each one is incorporated before adding the next. Stir in the vanilla extract.
Step 3: Combine and Divide the Batter
It’s time to bring it all together! Gently mix in half of your dry ingredients until just combined. Follow that with the milk and sour cream, then mix in the remaining dry ingredients until you have a smooth, uniform batter. Stop mixing as soon as the streaks of flour disappear to avoid a tough cupcake! Divide the batter evenly into your liners, filling each about two-thirds full.
Step 4: Bake and Cool
Slide that tray into the preheated oven for 18–20 minutes. You’ll know they’re ready when a toothpick inserted into the center comes out clean. Let them cool in the pan for a minute, then transfer them to a wire rack. Patience here is key—they must be completely cool before frosting!
Step 5: Make the Creamy Green Frosting
While the cupcakes cool, get started on the buttercream. Beat the softened butter until it’s super creamy. Gradually add the powdered sugar (sifting is a bonus!), mixing slowly at first to avoid a sugar cloud! Once combined, mix in the heavy cream and vanilla until the frosting is delightfully light and fluffy. Now, add your green food coloring until you hit that perfect holiday shade.
Step 6: Pipe and Decorate the Trees
Transfer your gorgeous green frosting to a piping bag fitted with a large star tip. Start at the edge of the cupcake and pipe a tall, rising swirl, slowly tapering up to a point—this creates the iconic Christmas tree shape! Decorate your trees with sprinkles or edible pearls for “ornaments,” and finish the whole look by gently pressing a mini star candy right on top.
Pro Tips for Making the Recipe

- Room Temperature is Non-Negotiable: Make sure your butter, eggs, milk, and sour cream are all at room temperature. This ensures they emulsify properly, giving you the best, lightest cake texture!
- Do Not Overmix: Seriously, be gentle! Overmixing the final batter develops the gluten too much, which results in a tough, dense cupcake. Mix only until the flour is just incorporated.
- The Perfect Green Hue: Use gel food coloring instead of liquid. Liquid can thin out your frosting, and gel gives you a much richer, deeper color with less product. Add it a little at a time!
- The Star Tip Secret: For the classic Christmas tree look, a large Wilton 1M or 2D star tip works like magic. Practice a few swirls on a piece of parchment paper before going straight for the cupcake!
How to Serve
These little festive trees are perfect all on their own, but here are a few fun ways to serve and pair them:
- The Dessert Table Star: Arrange them on a tiered serving platter with some fresh pine sprigs or a few fairy lights underneath for an absolutely beautiful presentation.
- Warm Beverage Pairing: Pair them with a steaming mug of Homemade Hot Chocolate, a creamy Peppermint Mocha, or a spiced Chai Latte.
- Festive Plate Combo: Serve them alongside some classic Gingerbread Cookies or Sugar Cookies to create a well-rounded holiday dessert plate.
Make Ahead and Storage
Planning ahead is the key to stress-free holiday entertaining!
Storing Leftovers
Place leftover cupcakes in an airtight container. They will stay fresh at room temperature for up to 2 days or in the refrigerator for up to 4 days. If you refrigerate them, let them come to room temperature before serving for the best texture.
Freezing
You can freeze the unfrosted cupcakes! Once completely cooled, wrap them tightly individually in plastic wrap, then place them in a freezer-safe bag or container. They can be frozen for up to 3 months. Thaw them overnight in the refrigerator before frosting and decorating.
Reheating
No need to reheat these! If they’ve been refrigerated, just allow them to sit at room temperature for about 30 minutes to let the cake soften and the frosting become perfectly creamy again.
FAQs
1. How can I get my Christmas Tree shape to stand tall and hold its form?
The secret is in the temperature and the consistency of the buttercream. Make sure your butter is softened, not melted, when you make the frosting. If your kitchen is very warm, you might want to add a tablespoon or two more powdered sugar to stiffen the frosting. Once piped, a quick chill in the refrigerator for about 15 minutes before serving will help them hold their beautiful shape perfectly.
2. Can I make the batter ahead of time?
While you can’t make the entire batter ahead, you can get a head start. The dry ingredients can be mixed up to a week in advance. You can also make the frosting up to three days ahead and store it in an airtight container in the fridge; just let it come to room temperature and give it a good whip to fluff it back up before piping.
3. What if I don’t have sour cream? Can I use something else?
Yes, you have a couple of great options! Plain, full-fat Greek yogurt is an excellent substitute as it offers a similar tang and thickness that helps keep the cake moist. You could also try buttermilk, but you may need to slightly reduce the amount of milk in the recipe to maintain the right batter consistency.
4. Can I use a different flavor cupcake base for this recipe?
Absolutely! These are gorgeous on a classic vanilla, but they would be stunning on a chocolate, red velvet, or even a subtle peppermint base. The green frosting and star topping work well with virtually any flavor. Just stick to the same baking time guidelines for the new flavor.
Christmas Tree Cupcakes
Ingredients
Equipment
Method
- Preheat oven to 350°F (175°C) and line a muffin tin with cupcake liners.
- In a large bowl, whisk together flour, sugar, cocoa powder, baking soda, and salt.
- Add milk, vegetable oil, egg, and vanilla. Mix until smooth.
- Pour batter evenly into cupcake liners, filling each about 2/3 full.
- Bake for 18–20 minutes or until a toothpick inserted in the center comes out clean. Let cool completely.
- In a bowl, beat butter until fluffy. Gradually add powdered sugar and milk, then mix in green food coloring until desired color is reached.
- Transfer frosting to a piping bag fitted with a star tip. Pipe swirls onto each cupcake to form a Christmas tree shape.
- Decorate with sprinkles or candy stars and enjoy!