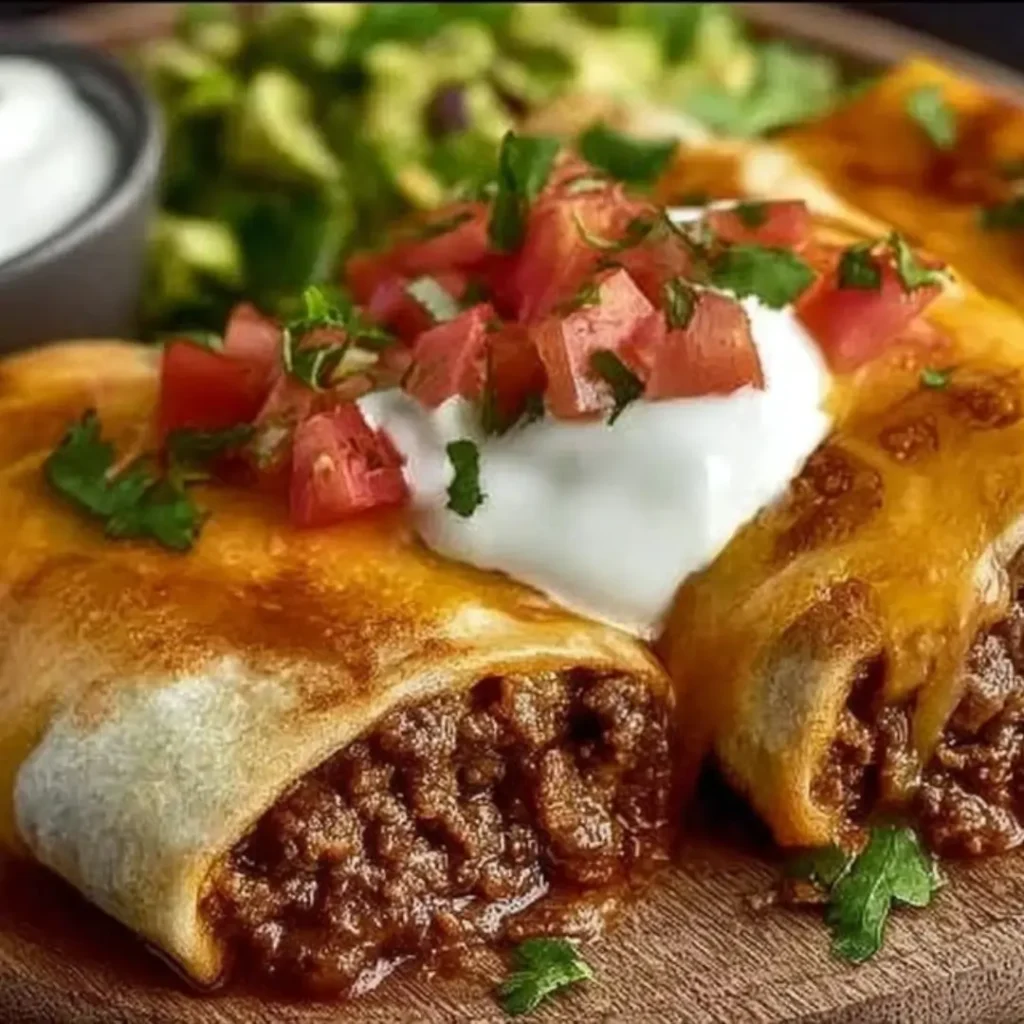
There are few things more satisfying than sinking your teeth into a perfectly crispy shell to find a warm, gooey, savory filling. This Beef and Cheese Chimichanga is everything you love about Mexican comfort food, simplified and baked to golden perfection! We’re skipping the deep-fryer without sacrificing that essential crunch, packing each tortilla with seasoned ground beef, creamy refried beans, and a double-whammy of melted, salty cheese. This one’s a game-changer for your weeknight dinner rotation—it’s quick, easy, and undeniably delicious.
Why You’ll Love This Recipe
- Ultimate Comfort Food: It’s a warm hug in a crispy tortilla! The combination of seasoned meat and melted cheese is simply irresistible.
- Baked, Not Fried: We are using a simple brush of melted butter and a hot oven to achieve an incredibly crispy texture without the hassle (or grease) of deep frying. Minimal cleanup, maximum crunch!
- Family Favorite: This recipe is highly customizable and always a huge hit with kids and adults alike. Get ready for requests to put this one on repeat.
Ingredients
All you need for this incredible Beef and Cheese Chimichangas Recipe is a handful of pantry staples and about 40 minutes of your time. Yes, it’s that easy. But first, let’s gather up these key ingredients:
- Ground Beef: The hearty, savory foundation of the filling. We’re using lean ground beef to keep the filling rich and flavorful.
- Olive Oil: Essential for sautéing our aromatics and building the base of our delicious filling.
- Small Onion & Garlic: These two are the secret handshake of any great savory dish! Finely chopped, they bring a necessary layer of aromatic depth to the beef.
- Chili Powder, Ground Cumin, & Paprika: This trio of spices creates the classic, warm, and earthy Mexican flavor profile that defines a great filling. Don’t skip these!
- Salt and Pepper: Always season as you go—these enhance all the other flavors we are layering in.
- Tomato Sauce: Adds moisture, a bit of tang, and helps bind the spices to the meat, creating a richer sauce consistency.
- Refried Beans: This is the creamy binder! Mixing these in keeps the filling from being dry and adds an extra layer of savory depth and texture.
- Cheddar & Monterey Jack Cheese: We’re going for a cheesy dream team! Cheddar adds sharpness while Monterey Jack melts beautifully, guaranteeing that incredible, gooey pull.
- Large Flour Tortillas: The vessel for all this goodness. Make sure they are soft and fresh to ensure easy folding.
- Melted Butter: Our magic ingredient for the baked crispness. A light brush on the outside is what gives us that beautiful, golden crunch.
- Sour Cream, Guacamole, & Salsa: The perfect cool, creamy, and zesty finishing touches!
Note: The ingredients with precise measurements and nutritional information will be listed below in the printable recipe card.
How to Make the Beef and Cheese Chimichangas
Step 1: Prep and Sauté the Aromatics
Preheat your oven to a nice and hot 400°F (200°C) and line a baking sheet with parchment paper. Heat your olive oil in a large skillet over medium heat, then add your chopped onion and minced garlic. Sauté for about 2-3 minutes until they become soft and fragrant—this is where the flavor magic starts!
Step 2: Cook and Season the Beef
Toss the ground beef into the skillet and cook until it’s fully browned. Make sure you break it up with your spoon as it cooks. Once it’s done, drain any excess fat so our filling isn’t greasy. Now, stir in your chili powder, cumin, paprika, salt, pepper, and the tomato sauce. Let it simmer and cook for just 2 minutes so those spices really wake up, then take the skillet off the heat.
Step 3: Mix the Filling and Assemble
Stir the refried beans into the seasoned beef mixture until everything is beautifully combined. Let the filling cool slightly—this makes it much easier to handle and prevents the tortillas from getting soggy too fast. Now, lay a tortilla flat, spoon some of the filling into the center, and sprinkle generously with both the cheddar and Monterey Jack cheese.
Step 4: Fold and Brush for Crispy Edges
Fold the sides of the tortilla in first, then roll it up tightly from the bottom to form a neat chimichanga. Place it seam-side down on your prepared baking sheet. Once they’re all lined up, brush each chimichanga lightly all over with melted butter. This butter layer is what gives us that gorgeous color and crunchy exterior!
Step 5: Bake to Golden Perfection
Bake your chimichangas for 20–25 minutes, making sure to flip them halfway through the cooking time. You’re looking for a beautiful golden-brown color and that irresistible crispy texture.
Step 6: Serve and Enjoy!
Carefully take them out of the oven and serve them piping hot with a big dollop of cool sour cream, creamy guacamole, and a side of your favorite salsa. Pure perfection!
Pro Tips for Making the Recipe
- Don’t Overfill: It can be tempting to stuff them, but using too much filling makes the chimichangas hard to roll and prone to splitting while baking. Stick to a reasonable amount that allows for a tight, secure wrap.
- The Key to Folding: Make sure you roll them up as tightly as possible! A tight roll is what helps the chimichanga keep its shape and prevents the filling from oozing out. Placing them seam-side down is your insurance policy.
- Keep Them Warm: If you’re baking in batches, you can keep the already-cooked chimichangas warm in a low oven (around $200^\circ\text{F}$ or $95^\circ\text{C}$) while the rest finish baking.
How to Serve
Chimichangas are delicious on their own, but they truly shine when paired with fresh, cool toppings. Here’s how you can serve this flavorful meal:
- The Essential Toppings: Never skip the classics! A generous dollop of sour cream (or Greek yogurt for a lighter option), a spoonful of fresh guacamole or sliced avocado, and a vibrant salsa are a must.
- On the Side: Serve alongside some fluffy Mexican rice (or cilantro-lime rice) and an extra scoop of refried beans.
- For Freshness: A simple green salad with a zingy lime vinaigrette or a quick pico de gallo will cut through the richness beautifully.
Make Ahead and Storage
Storing Leftovers
Place any leftover chimichangas in an airtight container and store them in the refrigerator for up to 3 days.
Freezing
You can actually freeze these either baked or unbaked!
- Unbaked: Wrap each tightly in plastic wrap, then place them in a freezer-safe bag. Freeze for up to 2 months. Bake straight from frozen (add about 10-15 minutes to the bake time).
- Baked: Place cooled, baked chimichangas in a single layer in a freezer-safe bag or container for up to 2 months.
Reheating
The best way to reheat leftovers is in the oven or a toaster oven at $350^\circ\text{F}$ ($175^\circ\text{C}$) for 10-15 minutes until crispy again. The microwave is a no-go—it will leave them soggy!
FAQs
1. How can I make these chimichangas spicier?
It’s super easy to crank up the heat if you like a little kick! You can add a pinch of cayenne pepper in with the other spices (step 4), or you can mix in a tablespoon of canned, diced green chiles or jalapeños to the filling along with the refried beans. Another great option is to simply serve them with a hot salsa or a drizzle of your favorite hot sauce!
2. Can I use a different type of protein besides ground beef?
Absolutely! This recipe is incredibly versatile. You can easily substitute the ground beef with ground chicken or ground turkey for a leaner option. You can also use shredded pre-cooked chicken (like rotisserie chicken) or even pork carnitas. If you choose to use shredded meat, make sure to add a little extra tomato sauce or broth to keep the filling moist before stuffing the tortillas.
3. What can I use if I don’t have Monterey Jack cheese?
No problem at all! The goal is gooey, salty goodness, so you can easily substitute Monterey Jack with another great melting cheese. Mozzarella works really well and is readily available, or you could opt for a blend of Colby Jack or even Pepper Jack if you want to add an extra layer of flavor and a touch of heat. Just make sure you shred it yourself for the best melt!
4. Can I prepare the filling ahead of time for easy assembly?
Yes, you can definitely make the filling ahead of time! Cook the beef and bean mixture completely, let it cool, and store it in an airtight container in the refrigerator for up to 3 days. When you’re ready to assemble, just take the filling out, let it warm up slightly, and proceed with step 6 (stuffing and rolling) as directed. This is a great tip for quick weeknight cooking!

Beef and Cheese Chimichangas
Ingredients
Equipment
Method
- In a large skillet over medium heat, cook ground beef and onion until beef is browned and cooked through. Drain excess fat.
- Add garlic, chili powder, cumin, salt, and pepper. Stir in salsa and simmer for 3–5 minutes. Remove from heat and stir in cheese until melted.
- Spoon the beef mixture evenly onto the center of each tortilla. Fold in sides, then roll up tightly to seal the filling.
- Heat butter or oil in a skillet over medium heat. Place chimichangas seam-side down and cook until golden brown on all sides, about 2–3 minutes per side.
- Alternatively, for a lighter version, brush chimichangas with oil and bake at 400°F (200°C) for 20 minutes until crisp.
- Serve hot with sour cream, guacamole, or pico de gallo.