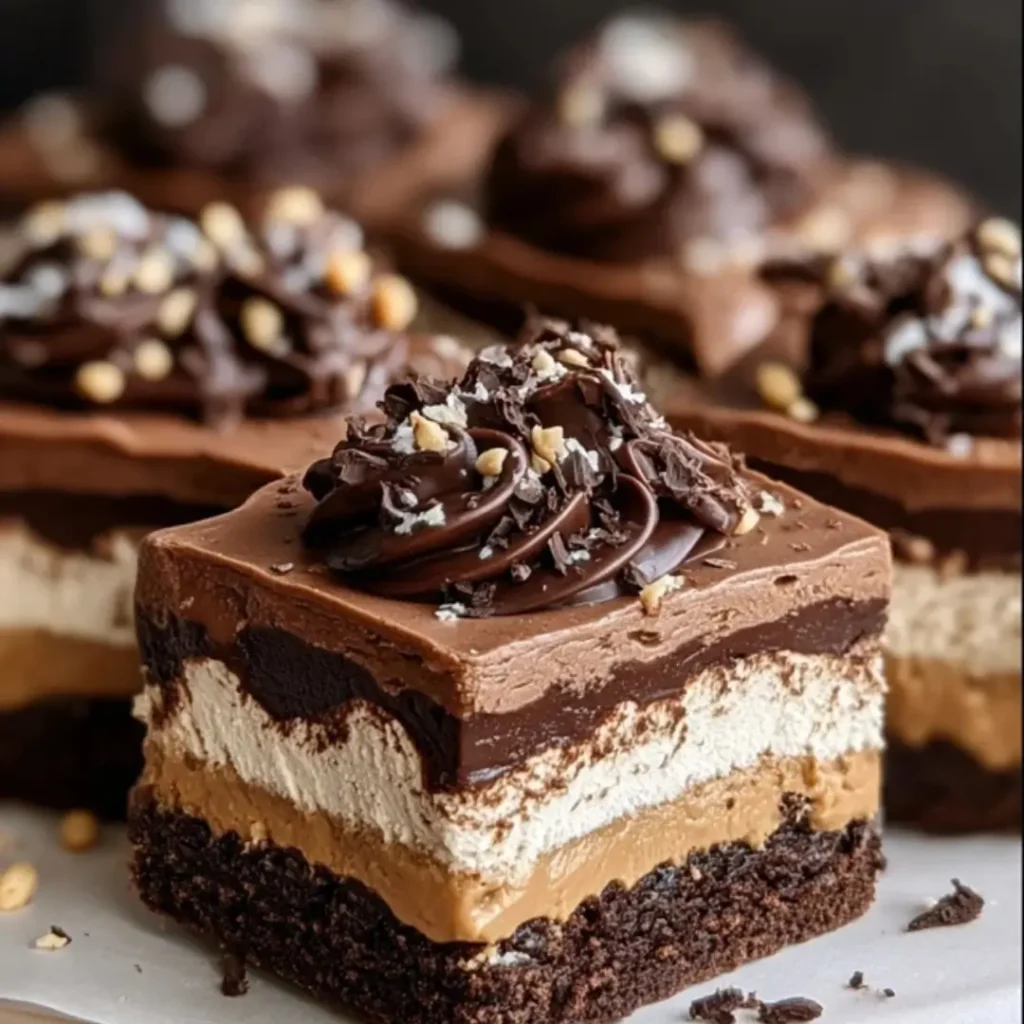
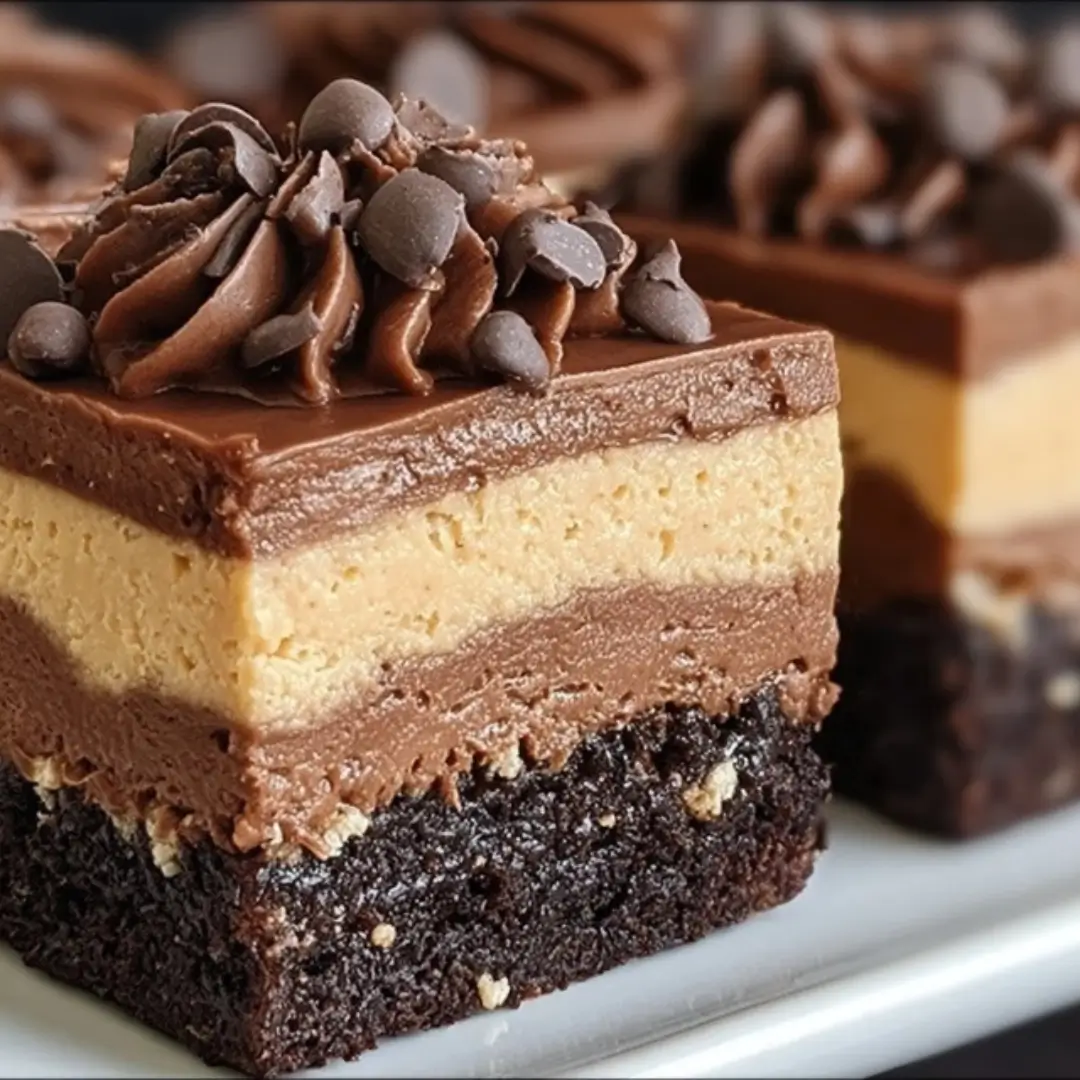
This no-bake masterpiece is the ultimate collision of sweet and salty, blending a buttery chocolate crust with a creamy, rich peanut butter filling and a smooth, decadent chocolate pudding layer. It’s a make-ahead dessert that comes together with minimal effort but delivers maximum flavor. You’re going to be absolutely obsessed with how simple and spectacular these dreamy bars are. Trust me, this one’s a game-changer!
Why You’ll Love This Recipe
- No-Bake Bliss: Seriously, who wants to turn on the oven when you can have a perfect dessert chilling in the fridge? This is a completely oven-free operation, making it perfect for those warm-weather cravings!
- The Ultimate Flavor Combo: Chocolate and peanut butter are the culinary power couple, and they shine here! The salty, creamy peanut butter against the rich, dark chocolate is simply UNREAL.
- Whip-It-Up Easy: The steps are so straightforward. If you can mix, spread, and chill, you can make this! It’s an ideal recipe for beginner bakers or anyone looking for a low-effort, high-reward treat.
- Total Crowd-Pleaser: These bars are always the first to disappear at any gathering. They look impressive but are secretly so simple!
Ingredients
All you need for this dreamy dessert are a few simple things and about 20 minutes of active prep time! But first, gather up these essentials.
- Crushed Chocolate Graham Crackers: This forms the sturdy, buttery foundation. Using chocolate adds an extra layer of richness right from the start!
- Unsalted Butter, Melted: The magical binder that holds the crust together and adds a necessary richness to the base.
- Creamy Peanut Butter: The star of the show! It brings that irresistible salty-sweet flavor and makes the filling wonderfully creamy.
- Powdered Sugar: Used to sweeten the peanut butter layer without any graininess, ensuring a silky smooth texture.
- Cream Cheese, Softened: This is the secret to a perfect, stable, and slightly tangy peanut butter filling. Make sure it’s nice and soft for a smooth blend!
- Whipped Topping (divided): Lightens the peanut butter layer and provides a fluffy, ethereal cloud for the final garnish.
- Instant Chocolate Pudding Mix: This is the speedy path to a thick, cold, and dark chocolate layer—use instant to keep it truly no-bake!
- Cold Milk: Essential for activating and setting the instant pudding mix. Make sure it’s nice and cold!
- Mini Chocolate Chips: A little decorative sprinkle that adds a pop of chocolate flavor and texture to the top.
- Crushed Peanuts: Adds a great crunch and reinforces that gorgeous peanut butter flavor on top.
Note: The exact measurements for all of these ingredients, along with the full recipe card, can be found right under the article!
How to Make the Chocolate Peanut Butter Dream Bars
This recipe is as simple as layering one perfect thing after another. Let’s do this!
Step 1: Prep and Press the Crust
In a medium bowl, combine the crushed chocolate graham crackers with the melted butter. Stir until all the crumbs are evenly moistened. Press this mixture firmly into the bottom of an 8×8-inch baking dish. Pop the dish in the fridge to chill for about 10 minutes while you prepare the next layer.
Step 2: Create the Creamy Peanut Butter Layer
In a separate bowl, use a hand mixer or stand mixer to beat the peanut butter, powdered sugar, and softened cream cheese until the mixture is completely smooth and fluffy. Then, gently fold in a portion of the whipped topping until the filling is perfectly creamy and light. Carefully spread this glorious peanut butter mixture evenly over your chilled crust.
Step 3: Mix and Spread the Chocolate Pudding
In a third bowl, whisk together the instant chocolate pudding mix and the cold milk. Keep whisking vigorously for about 2 minutes until the mixture begins to thicken. It happens quickly! Spread the thickened chocolate pudding gently over the peanut butter layer, taking care not to mix the layers.
Step 4: Top and Chill
Gently spread the remaining whipped topping over the dark chocolate pudding layer. Finish by sprinkling the top with the mini chocolate chips and the crushed peanuts. The waiting is the hardest part! Refrigerate the bars for at least 3 hours before slicing. This allows all the layers to set up beautifully so you get clean, stunning slices!
Pro Tips for Making the Recipe
- Softened Cream Cheese is Key: Make sure your cream cheese is truly softened (room temperature) before you start beating it. This prevents lumps and ensures the peanut butter layer is flawlessly smooth.
- Chill the Crust: Don’t skip the 10-minute chill after pressing the crust! This helps the butter firm up and keeps the crust from crumbling when you spread the next layer on top.
- Go Gently on the Pudding: When spreading the pudding over the peanut butter layer, use the back of a spoon or an offset spatula and spread very gently, working from the center outward, to keep the layers distinct.
- Use Instant Pudding Only: This recipe relies on instant pudding to set quickly and firmly without heat. Cook-and-serve pudding will not work here!
How to Serve
These bars are basically a full-service dessert, but here’s how you can make them even better:
- Serving Temperature: They are best served cold, straight from the refrigerator, where the layers are firm and distinct.
- Perfect Pairings: Serve alongside a fresh cup of coffee or a tall glass of cold milk. For an adult treat, a drizzle of chocolate liqueur on the plate is a decadent touch!
- Cutting Trick: For the cleanest slices, run a long knife under hot water, wipe it dry, and then slice. Repeat this for every cut—it makes a difference!
Make Ahead and Storage
Storing Leftovers
Place any leftover bars in an airtight container and store them in the refrigerator for up to 3 to 4 days. They taste amazing the day after!
Freezing
Yes, you can freeze these dream bars! Place the uncut, fully set bars in a freezer-safe container. Cover the top with plastic wrap pressed directly against the surface, then seal the container. Freeze for up to 2 months. Thaw overnight in the refrigerator before serving.
Reheating
No reheating required! These are meant to be enjoyed cold. Simply remove from the fridge and slice.
FAQs
1. Can I use a different size dish? If you use a 9×13-inch dish, the bars will be much thinner. You may want to double the recipe ingredients to achieve the same thickness and impressive layers as the 8×8-inch pan. You may also need to adjust the chilling time, as thinner layers will set up a bit faster.
2. Is there a substitute for the chocolate graham crackers? Absolutely! You can use regular graham crackers, Oreo cookies, or even vanilla wafer cookies for the crust. Just make sure to measure out 2 cups of the finely crushed crumbs, and adjust the melted butter slightly if the texture feels too dry or too wet before pressing it into the pan.
3. How can I make this recipe completely from scratch? If you want to skip the instant pudding and pre-made whipped topping, you can make your own cooked chocolate pastry cream for the pudding layer and whip heavy cream with a little powdered sugar for the whipped topping. This will add significant time and effort, but the richness will be even higher!
4. What is the best way to get clean slices? The secret to those beautiful, clean layers is simple: patience and a hot, clean knife. Ensure the bars have chilled for the full 3+ hours. Before slicing, run a sharp knife under very hot water, wipe it dry, and make a cut. Clean and reheat the knife before making the next cut.
Chocolate Peanut Butter Dream Bars
Ingredients
Equipment
Method
- Line an 8×8 pan with parchment paper.
- Mix crushed cookies and melted butter. Press firmly into the pan to form the crust.
- Beat cream cheese, peanut butter, and powdered sugar until smooth. Fold in whipped topping.
- Spread the peanut butter layer evenly over the crust.
- Heat chocolate chips and heavy cream until melted and smooth, then pour over the peanut butter layer.
- Chill for at least 3 hours or until fully set. Slice into bars and serve.