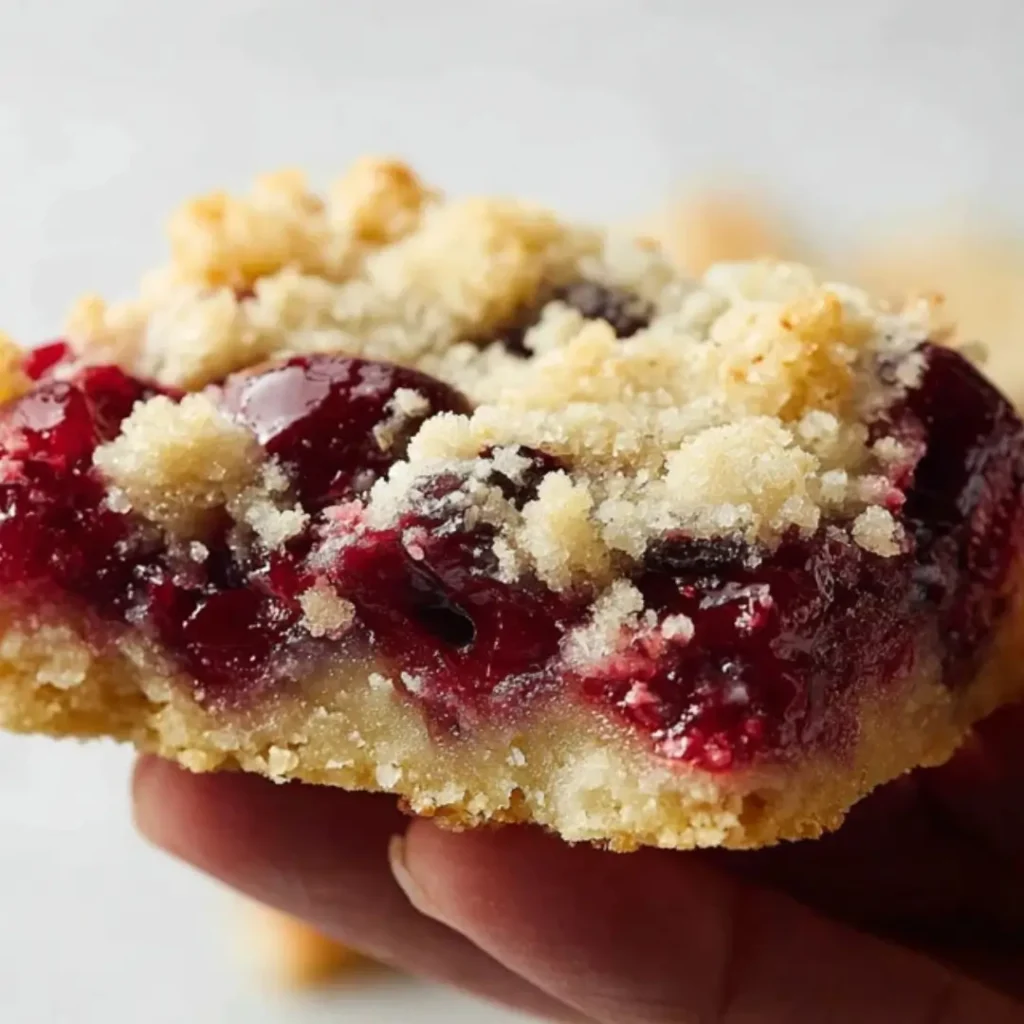
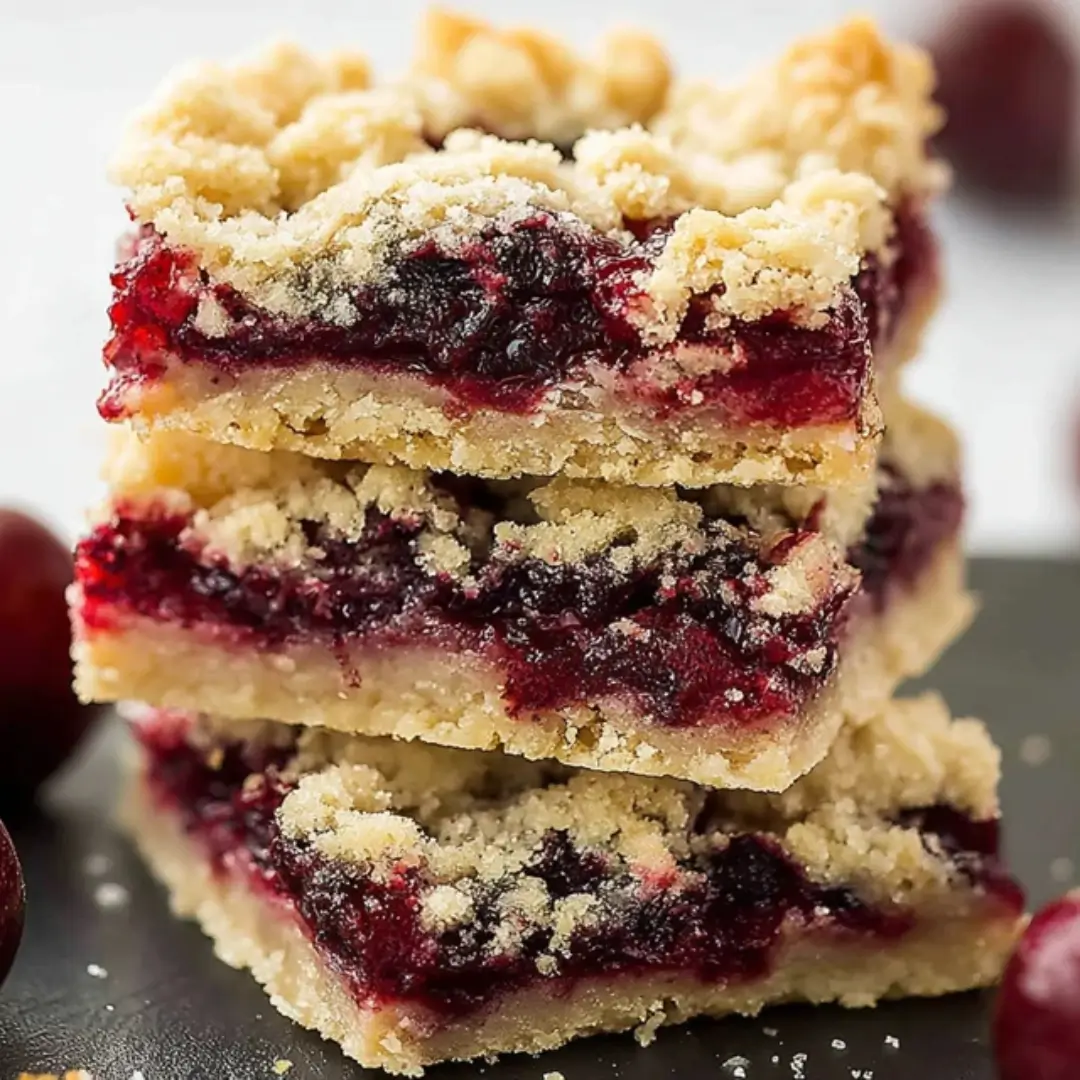
Today I’m bringing you a sweet treat that is an absolute game-changer for any baker: Cherry Pie Bars! Imagine the cozy, buttery flavor of homemade pie crust combined with the bright, vibrant burst of cherry filling, all wrapped up in an easy-to-grab bar. This recipe skips the fussy crimping and rolling of a traditional pie and gives you all that nostalgic flavor with minimum effort. Trust me, these bars are the perfect mix of chewy, soft, and fruity, and they disappear faster than you can say “second helping.” They truly bring the warmth and cheer of a classic dessert to your table!
Why You’ll Love This Recipe
- No-Fuss Pie Flavor: You get the irresistible taste of homemade cherry pie without the intimidating prep work of a traditional crust. It’s all about ease and big flavor!
- Perfectly Portable: Unlike a slice of pie, these bars are sturdy, easy to transport, and ideal for potlucks, picnics, or simply sneaking one from the fridge.
- Buttery, Dreamy Texture: The crust does double duty as both the bottom layer and the crumble topping, giving you that delightful combination of soft, chewy, and tender in every single bite.
- A Hint of Secret Flavor: We’re adding a touch of almond extract to the filling, which really makes that cherry flavor pop and smell absolutely divine as it bakes!
Ingredients
All you need for this comforting Cherry Pie Bars Recipe is about an hour and a few simple pantry staples. Gather up these ingredients, and let’s get baking!
- Unsalted Butter: Make sure it’s softened! This is key for creating that light and fluffy base that gives the crust its incredible, tender texture.
- Granulated Sugar: Sweetens the crust and helps cream together beautifully with the butter.
- Large Eggs: Our binding agent! They bring the dough together and keep the crust rich and moist.
- Vanilla Extract: The classic flavor enhancer that gives the crust a warm, comforting background note.
- All-Purpose Flour: The structure for our beautiful, buttery dough.
- Baking Powder: Provides a little lift to the crust, ensuring it isn’t too dense.
- Salt: Just a touch! It balances the sweetness of the sugar and really makes the buttery flavor shine.
- Cherry Pie Filling: The star of the show! Using a canned filling makes this recipe quick and easy, delivering that classic sweet cherry flavor.
- Almond Extract: This is our little secret weapon! It enhances and brightens the cherry flavor, making it taste like something truly special and homemade.
- Powdered Sugar: Perfect for a beautiful, simple dusting right before serving—it adds an elegant finishing touch!
Note: The exact measurements for these ingredients, along with the full recipe instructions, will be provided right under the article in the handy recipe card.
How to Make the Cherry Pie Bars Recipe

Step 1: Prep and Cream the Base
Preheat your oven to 350°F (175°C) and grab your 9×13-inch baking pan. Lining it with parchment paper is a must for easy removal! In a large bowl, get that butter and sugar creaming until it’s beautifully light and fluffy. This step is crucial for an airy, tender bar.
Step 2: Add Wet Ingredients and Form the Dough
Beat in your eggs one at a time, making sure each one is incorporated before adding the next. Then, stir in the vanilla extract. In a separate bowl, whisk together the flour, baking powder, and salt. Gradually add the dry ingredients to the wet mixture until a soft, pliable dough forms. Don’t overmix!
Step 3: Layer the Crust
Take about two-thirds of the dough and press it firmly and evenly into the bottom of your prepared baking pan. This will be the sturdy, buttery foundation for your bar.
Step 4: Add the Flavorful Filling
In a small bowl, stir the almond extract directly into the cherry pie filling. This quick step takes the filling from good to absolutely incredible! Spread this juicy cherry mixture evenly over the bottom layer of dough.
Step 5: Crumble and Bake
Take the remaining one-third of the dough and crumble it casually over the cherry filling. A rustic, uneven topping is exactly what we’re going for! Pop the pan into the preheated oven and bake for 35–40 minutes, until the topping is a gorgeous, light golden brown.
Step 6: The Hardest Part—Cooling!
Resist the urge to slice them immediately! These bars need to cool completely before you cut them. This allows the filling to set and the bars to hold their perfect shape. Once cool, dust with powdered sugar, slice, and enjoy!
Pro Tips for Making the Recipe

- The Parchment Paper Trick: I always recommend leaving a little overhang on the parchment paper. Once the bars are cool, you can use the overhang to easily lift the entire slab out of the pan for perfect, clean slices.
- Don’t Skip the Almond: That 1/2 teaspoon of almond extract makes a massive difference! It’s what gives these bars that bright, professional bakery flavor, so use it if you can.
- Achieve a Tender Crust: Don’t over-pack the dough when pressing it into the pan. Press firmly enough to create an even layer, but stop before it becomes dense or tough.
- Complete Cooling is Key: If you slice the bars while they are warm, the cherry filling will run out, and the bars will fall apart. Patience pays off here!
How to Serve
These Cherry Pie Bars are pretty fantastic on their own, but if you want to elevate them to dessert status, here are a few ideas:
- A La Mode: Nothing beats a warm bar topped with a scoop of vanilla bean ice cream or a dollop of whipped cream.
- Coffee or Tea Time: They are the perfect size and sweetness to enjoy alongside a warm cup of coffee or a comforting Earl Grey tea.
- Cheesy Pairing: For a salty-sweet contrast, serve them with a slice of sharp cheddar cheese—it’s a classic pairing for apple pie that works beautifully with cherry, too!
Make Ahead and Storage
Storing Leftovers
Place any leftover bars in an airtight container at room temperature for up to 3 days, or keep them in the refrigerator for up to 5 days. They stack nicely with a piece of parchment paper between the layers.
Freezing
Yes, you can absolutely freeze these! Once they are completely cooled, slice them into bars. Wrap individual bars tightly in plastic wrap, then place them in a freezer-safe bag or container. They will last in the freezer for up to 3 months.
Reheating
If frozen, thaw them overnight in the refrigerator. You can enjoy them at room temperature or warm them gently in a microwave for 15-20 seconds for that fresh, just-baked feel.
FAQs
1. Can I use a different fruit filling for this recipe?
Absolutely! This recipe is incredibly versatile. You can easily swap out the cherry filling for a 21-ounce can of apple, peach, blueberry, or even raspberry pie filling. Since the crust recipe is the same, the preparation steps are exactly the same, which makes experimenting with flavors super easy. If you choose a different fruit, you may want to swap the almond extract for a touch of cinnamon or lemon zest to complement the new flavor.
2. Why did my crust turn out hard instead of soft and tender?
If your crust is tough or hard, it’s usually due to one of two reasons: overmixing the dough or using cold butter. Remember to only mix the dry ingredients into the wet ones until a cohesive dough just forms; overmixing develops the gluten too much. Also, make sure your butter is genuinely soft (not melted or semi-hard) for the best, lightest crumb texture.
3. Is it possible to make this recipe with a homemade cherry filling?
You certainly can! While the recipe is designed for the convenience of canned filling, you can use about 2 to 2 1/2 cups of your favorite thick homemade cherry filling. The key is to ensure the filling is quite thick so that it doesn’t soak into the bottom crust too much during baking, which could result in a soggy bottom layer.
4. How do I know when the bars are perfectly baked?
The bars are ready when the topping is a beautiful, light golden brown color. You might also see the cherry filling bubbling slightly around the edges. Since the dough is pressed thinly, it cooks relatively fast. If you bake them much longer than 40 minutes, the bottom crust can become dry, so keep an eye on that rich, golden hue!
Cherry Pie Bars
Ingredients
Equipment
Method
- Preheat oven to 350°F (175°C) and line a 9×13-inch baking pan with parchment paper.
- Cream together the butter and granulated sugar until light and fluffy.
- Beat in the eggs one at a time, then mix in the vanilla extract.
- In a separate bowl, whisk together flour, baking powder, and salt.
- Gradually add the dry ingredients to the wet mixture until a soft dough forms.
- Press about two-thirds of the dough evenly into the prepared baking pan.
- Stir the almond extract into the cherry pie filling and spread evenly over the dough.
- Crumble the remaining dough over the cherry filling.
- Bake for 35–40 minutes until the top is lightly golden.
- Cool completely, slice into bars, and dust with powdered sugar before serving.